


Mid Production Tiger 1/16 Tamiya RC - progress report
 06-02-2024, 03:50 PM
#1
Hi,
Thought I'd send out a progress report since restarting my Mid Production Tiger project.
First, I'd like to thank this forum and members who have helped me out with info, knowledge ... and sharing their builds, etc.
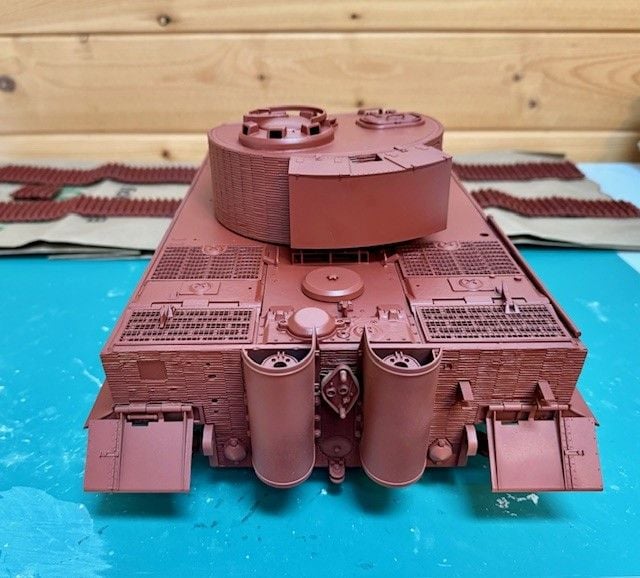
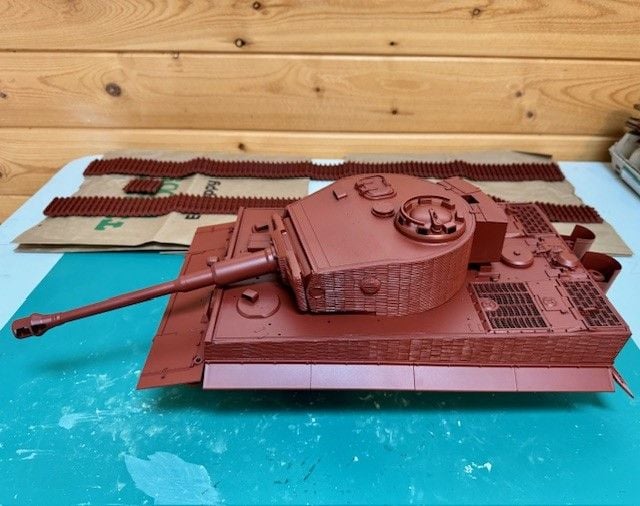
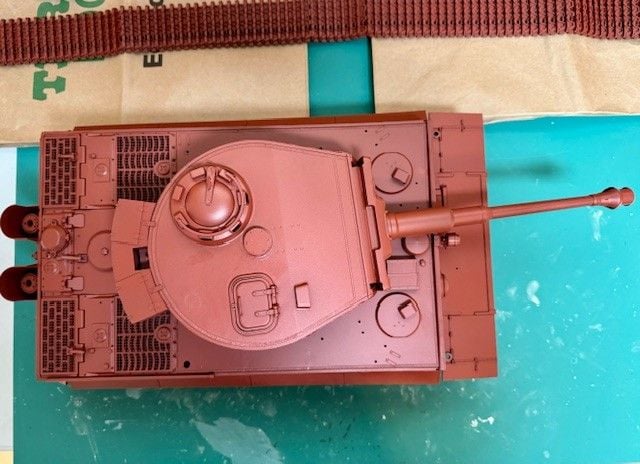
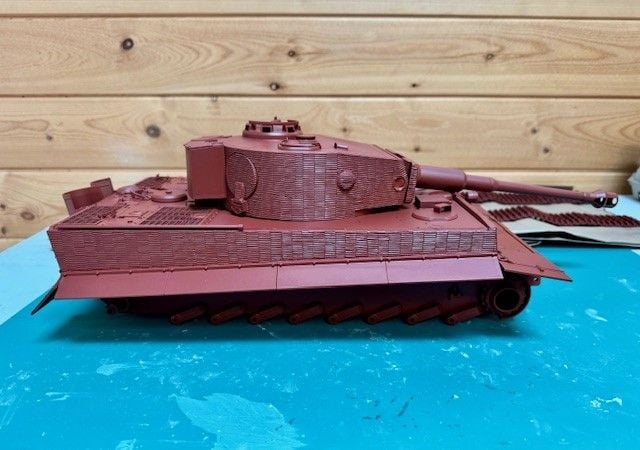
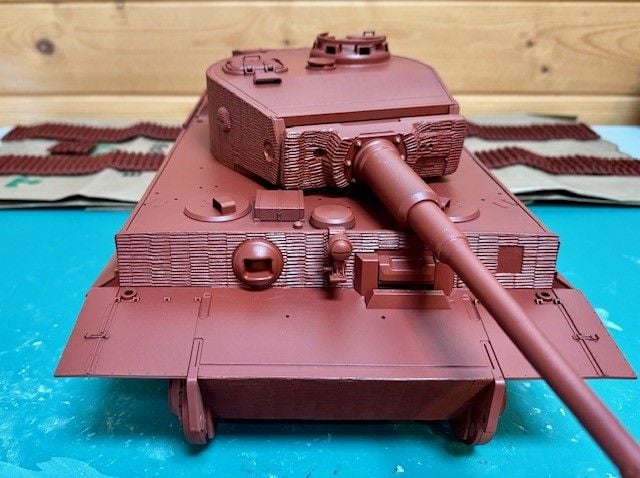
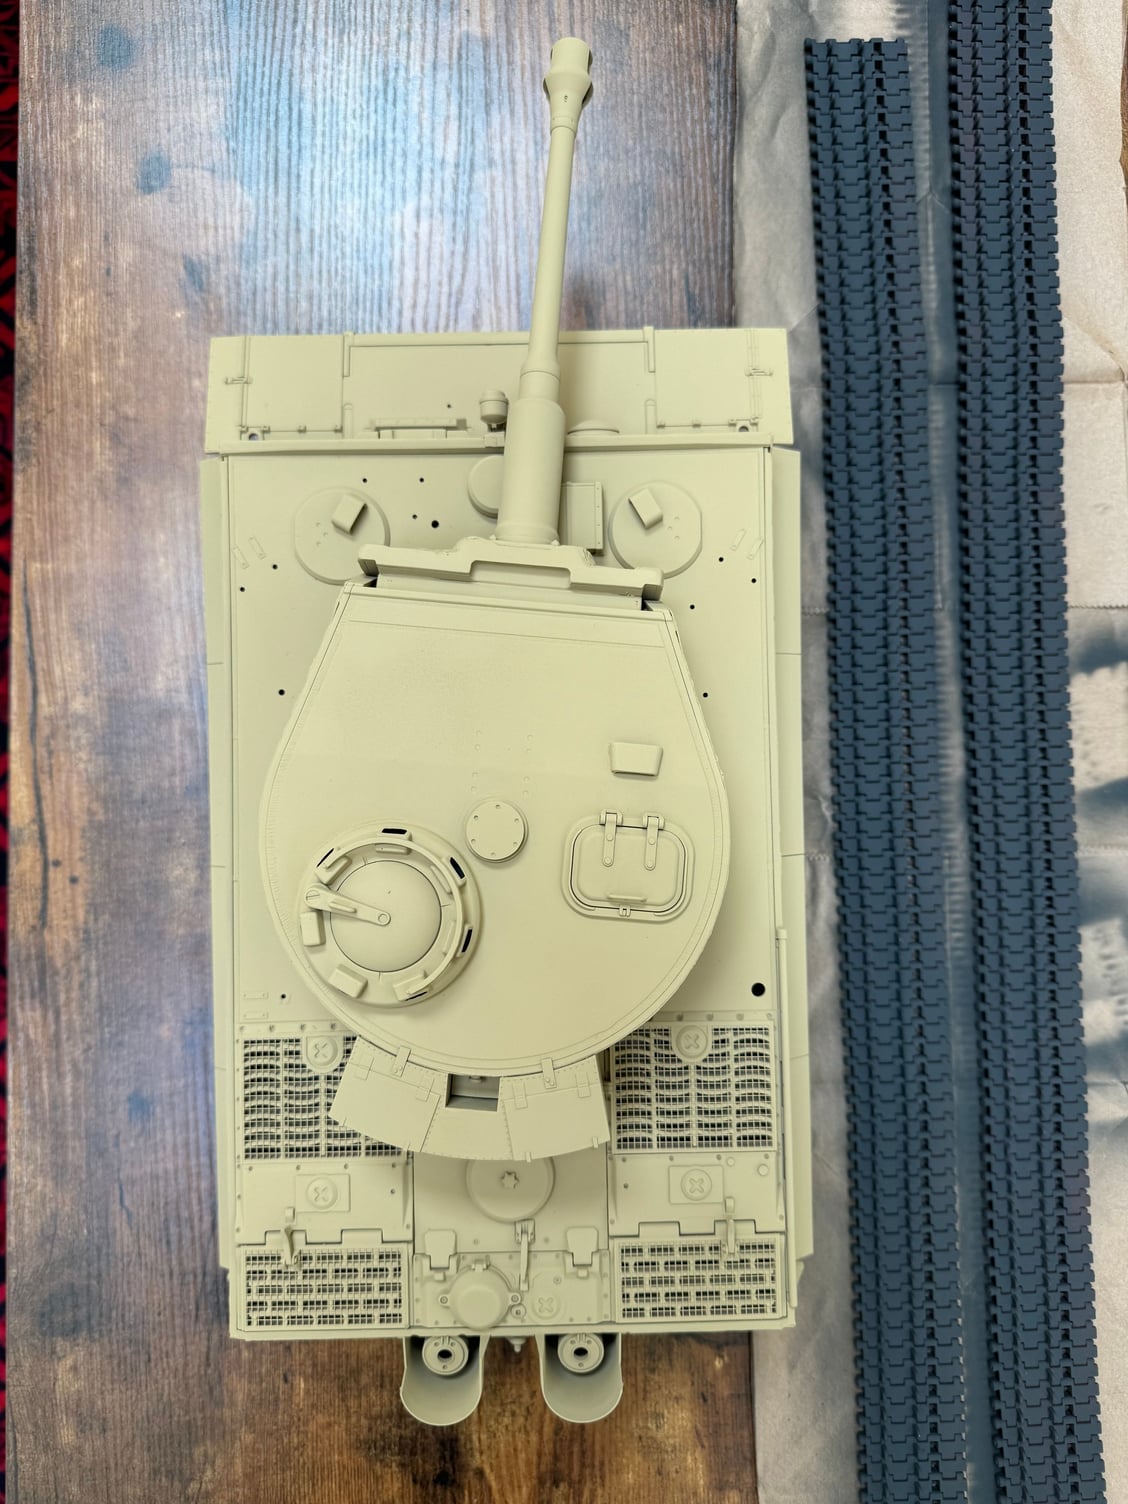
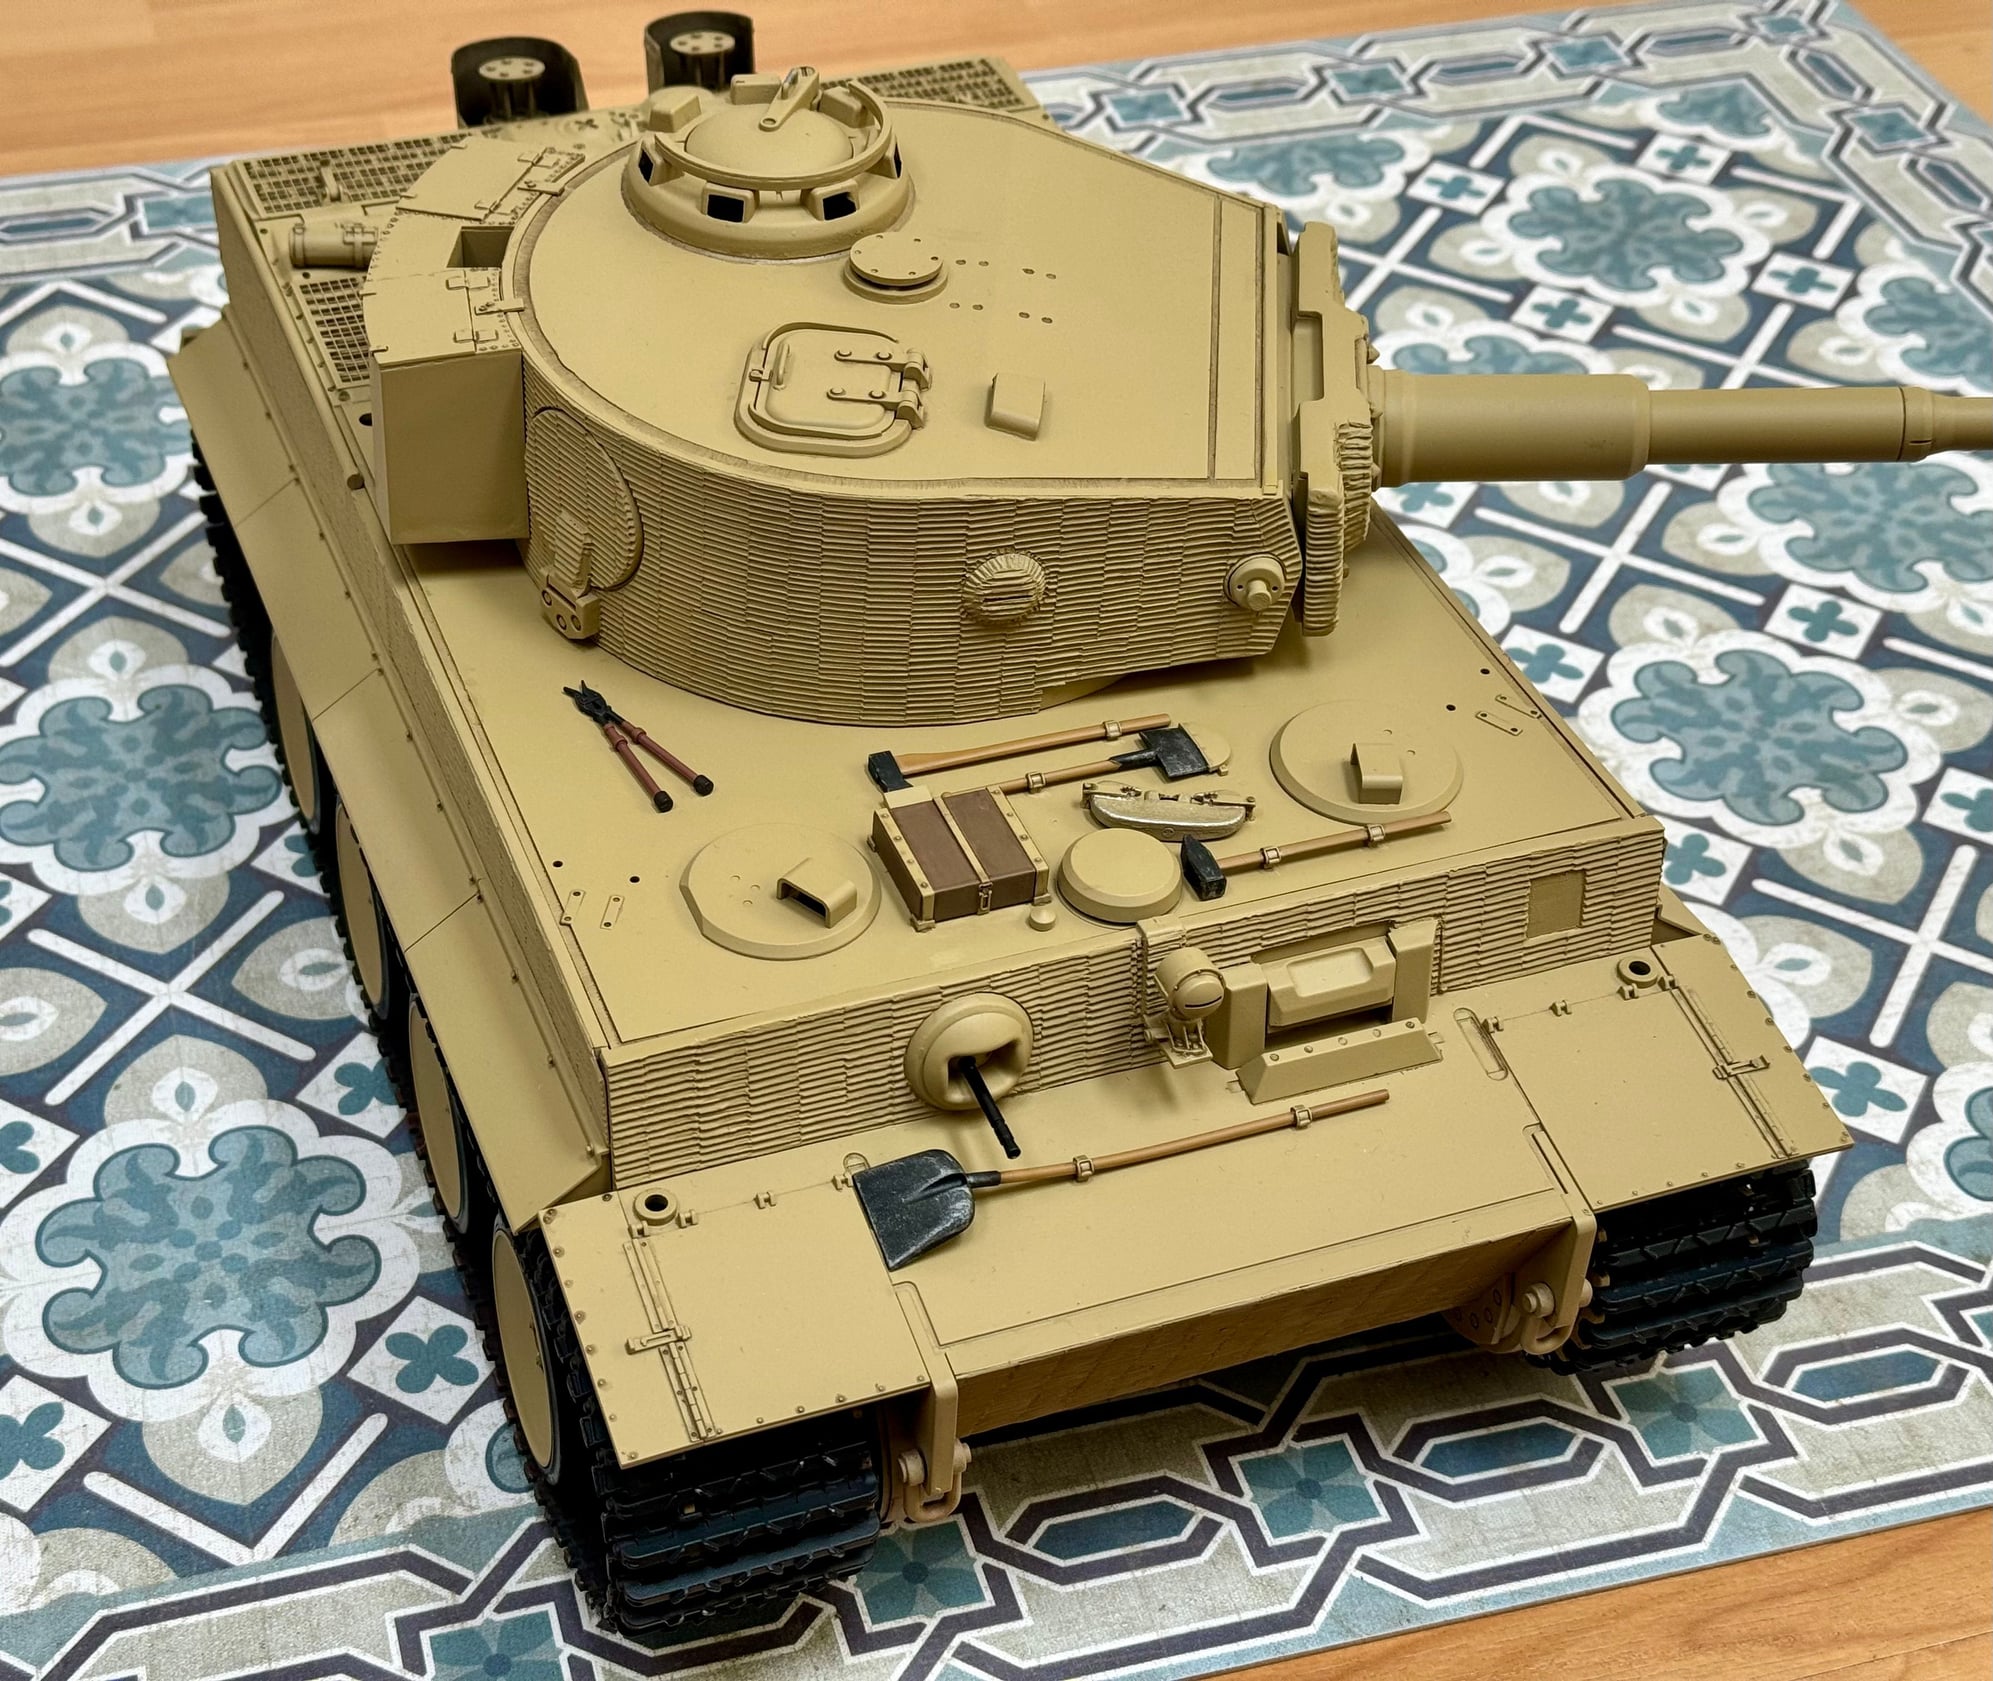
For now, I'll post some photos ...
Dave
Thought I'd send out a progress report since restarting my Mid Production Tiger project.
First, I'd like to thank this forum and members who have helped me out with info, knowledge ... and sharing their builds, etc.
For now, I'll post some photos ...
Dave

The following 2 users liked this post by dsbc:
Markocaster (06-05-2024),
tankme (06-02-2024)
06-03-2024, 06:36 AM
#2
I originally wanted to mod the Tamiya Tiger to a late model version in Normandy 503rd Heavy Tank Battalion (Operation Goodwood), but the steel wheels I ordered were below the quality I expected ... so sent them back.
Still wanting a newer production version Tiger ... I found info about some mid production types with rubber wheels, in Normandy (SS 101st Heavy Tank Battalion). So started with that idea.
I looked back on this forum to figure out how long it's been since I last worked on this model. Turns out ... 4 years, yikes.
I got bogged down with too many unknowns and failure to find the exact parts I wanted. And so, got a bit frustrated and put the Tiger away in a couple of drawers. But, never completely forgot about it.
Recently got the urge to get going on it, and surprisingly figured out one problem ... but discovered a new one.
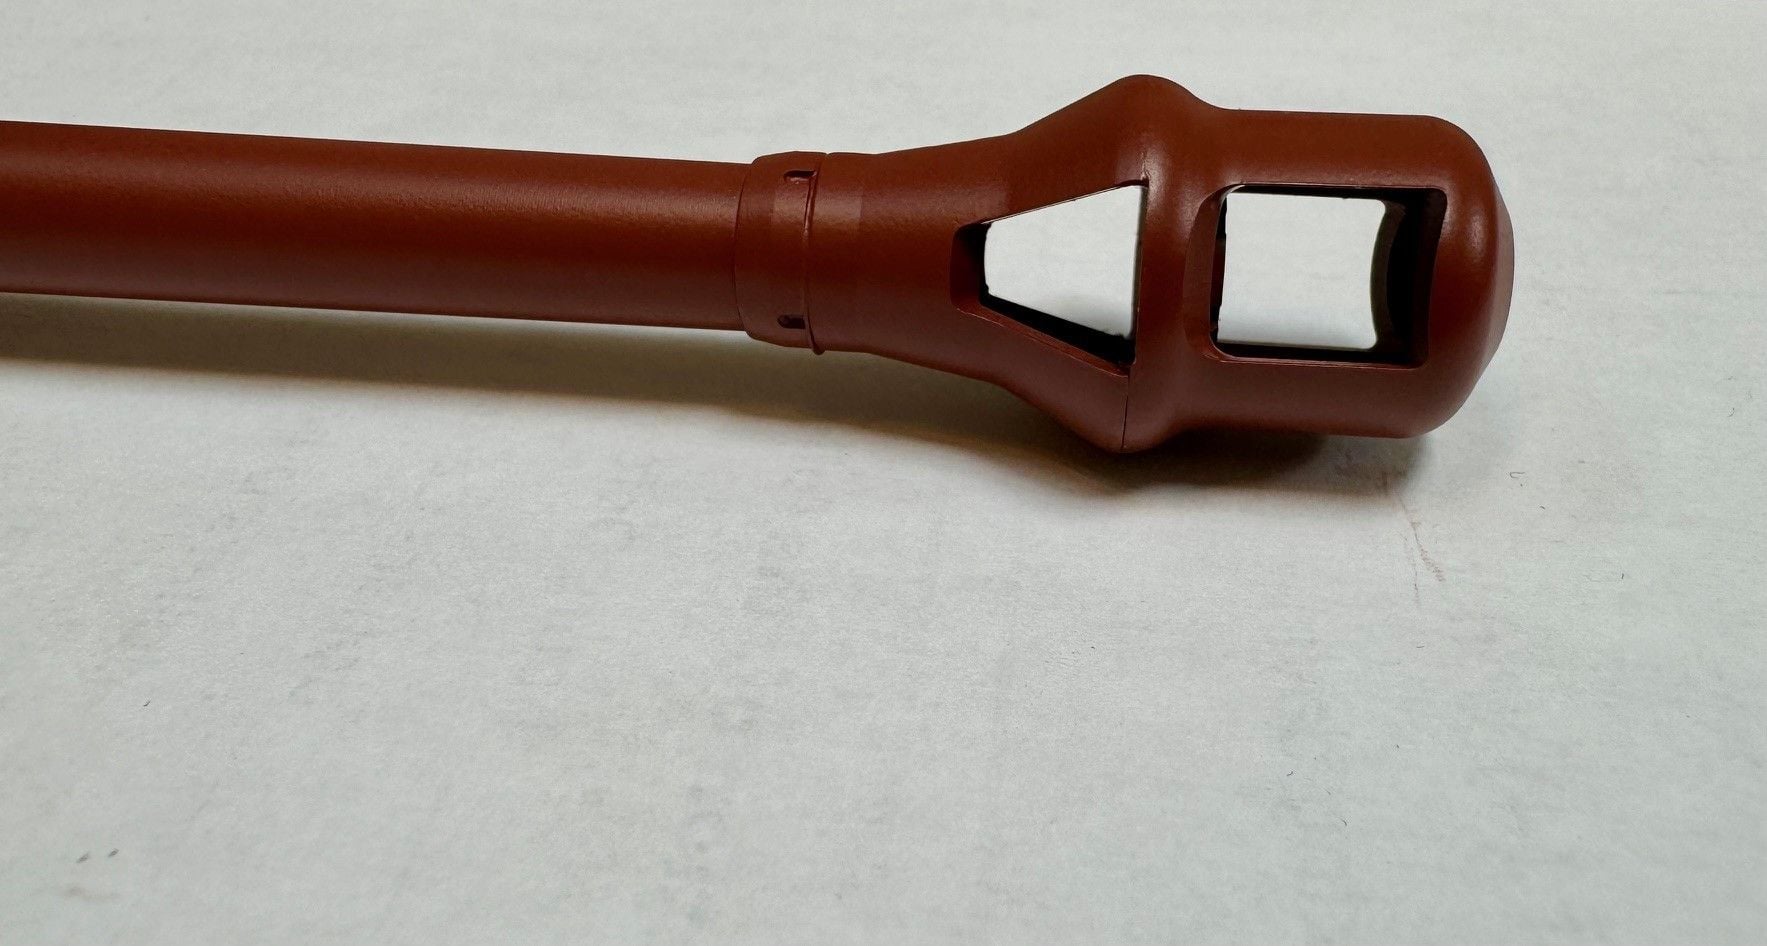
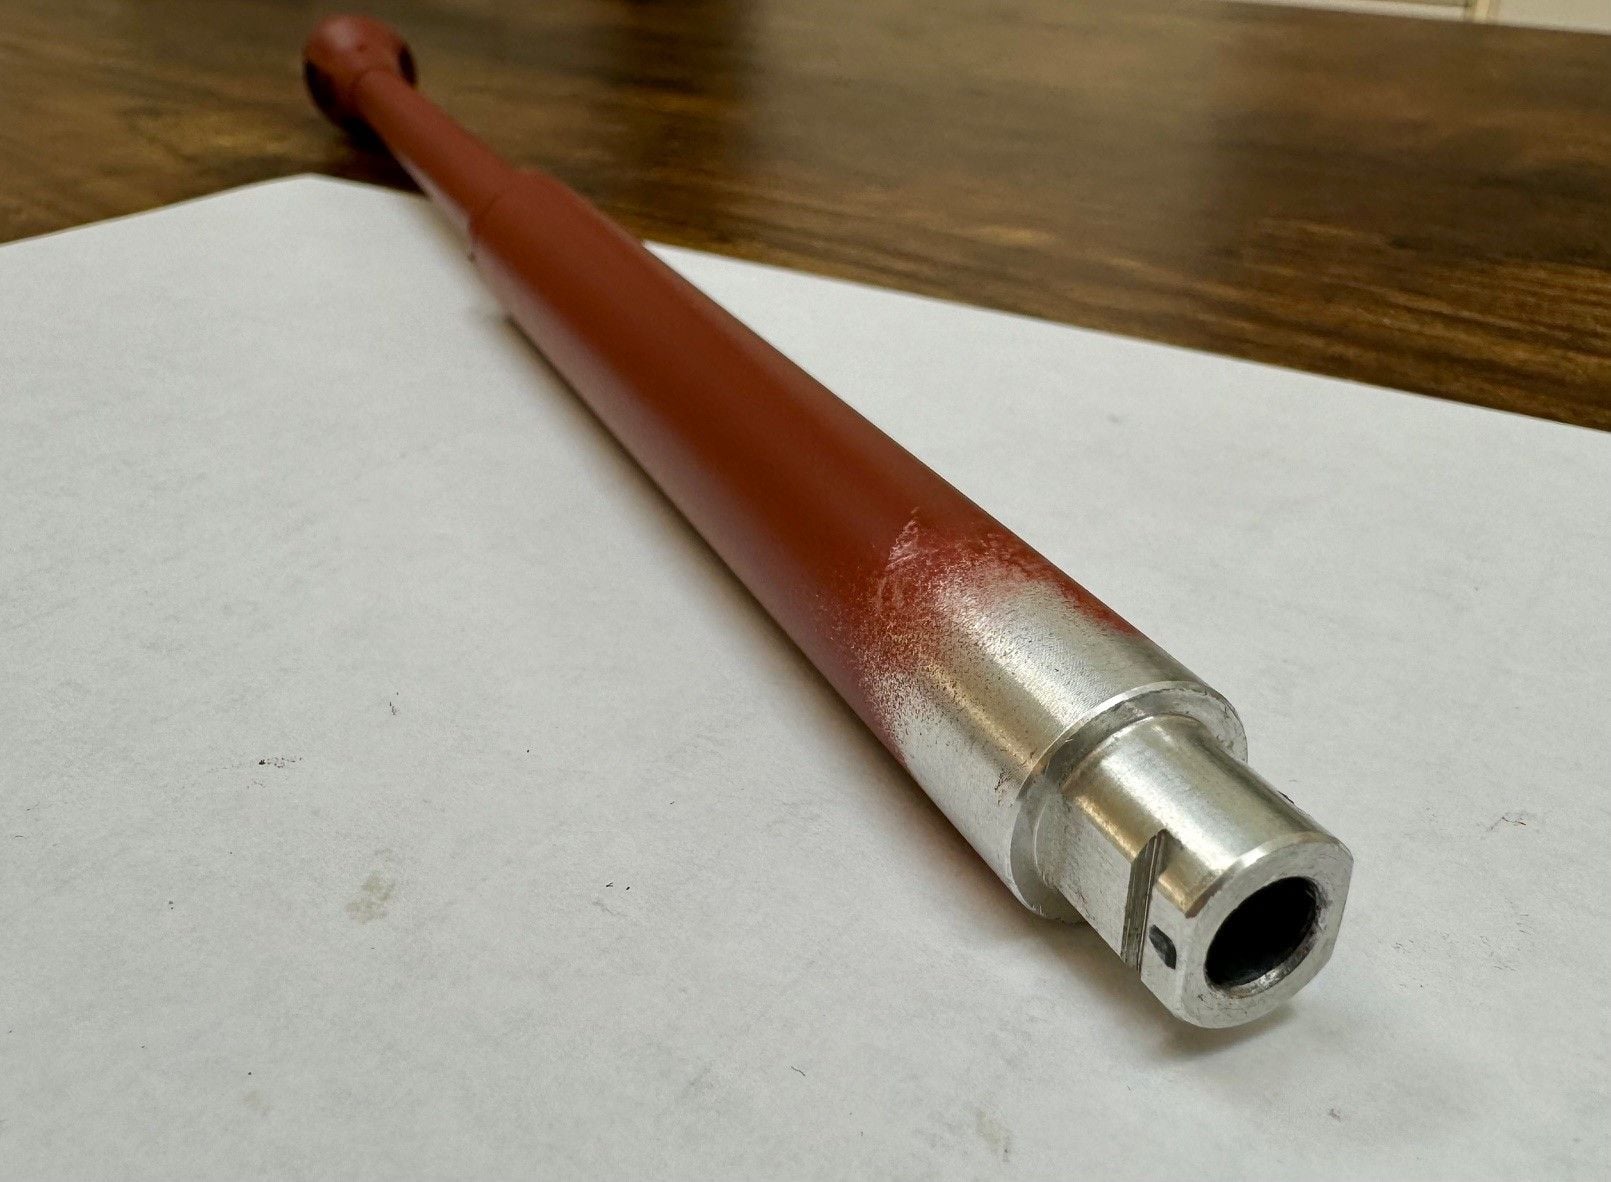
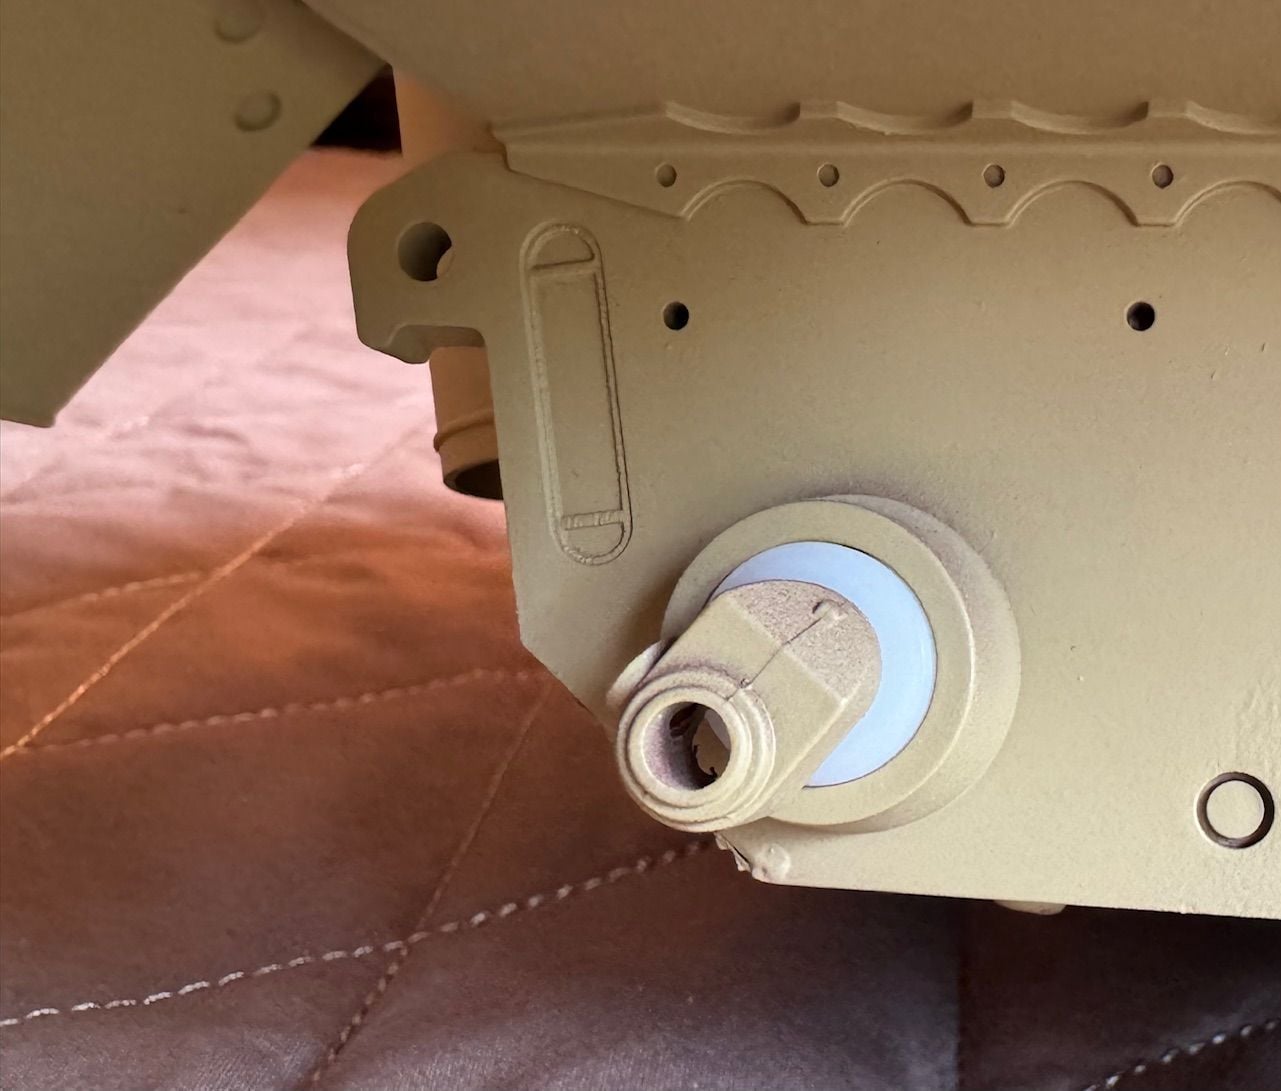
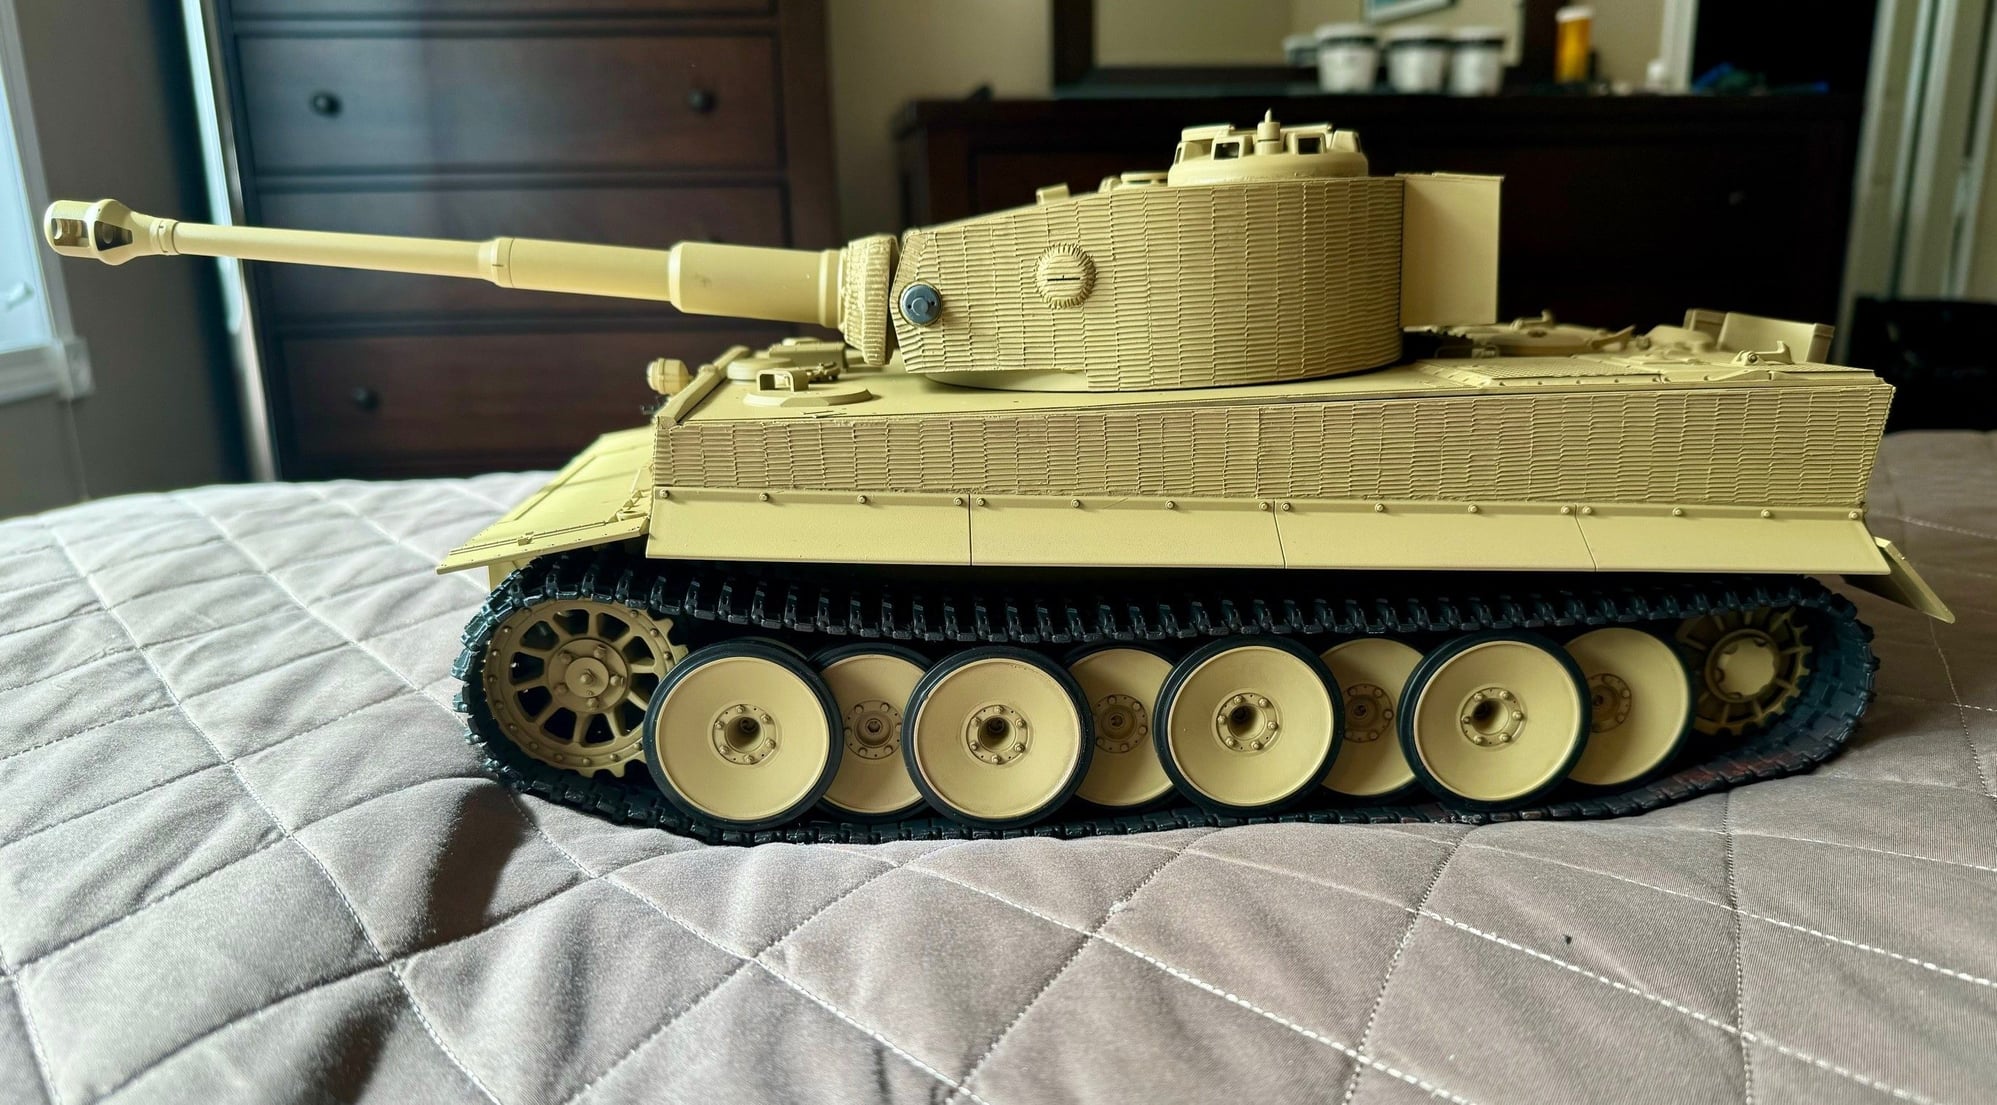
1. Gun barrel and muzzle brake:
I bought a great looking detailed barrel, but it wasn't hollow inside ... so no ability to install flash option. Also got a hollow version that came with a plastic muzzle brake.
Was thinking the solid barrel muzzle brake might fit on the hollow barrel with a bit of file work and some CA glue. It worked, so one problem sorted out.
but
2. Had previously painted road wheels and hull with XF-60, then flat clear coat. Instantly didn't like the color but didn't want to redo paint. A couple weeks ago, I watched a video about a build with XF-88 and like the look. Therefore, asked questions and thankfully got answers about how to redo the already painted areas.
3. Finding the exact parts:
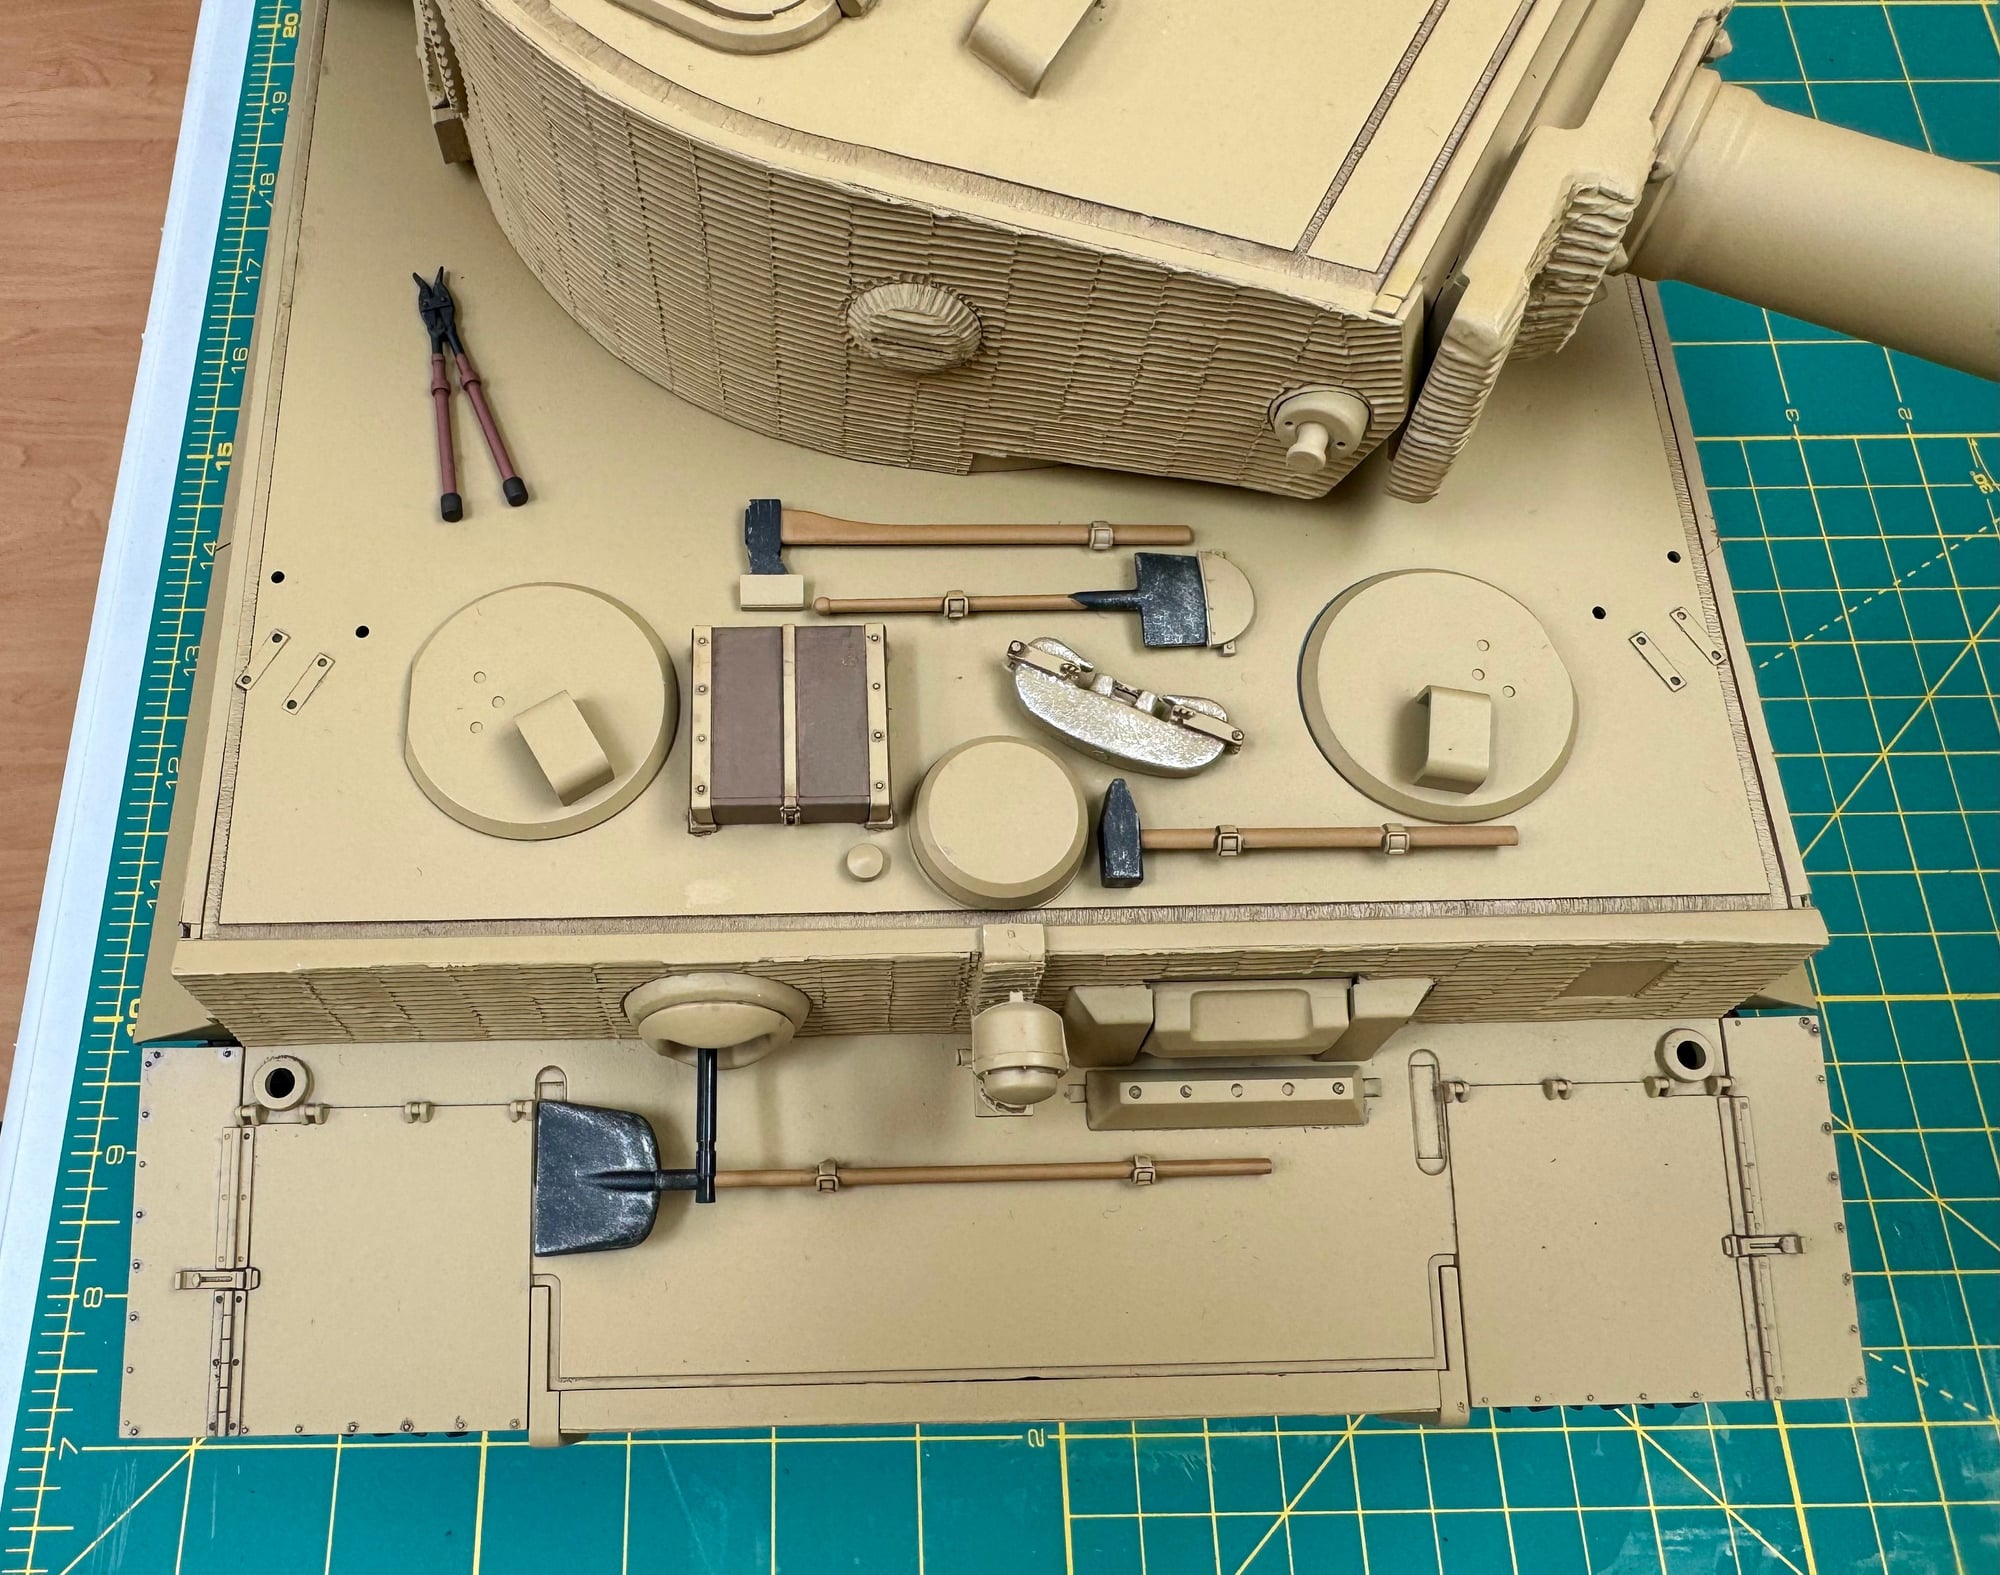
Some parts I bought were less detailed than the original parts and so, didn't use them ... like tow shackles, and a few tools.
The vent (beside the commander's copula) I bought, looked goofy. The bottom section didn't look right. I removed it and separated the top part and used a washer for the bottom part. It still isn't right, (and a few other detail parts also) but I've decided to let some things go ... and just get on with the project.
4. Bucket:
Bought an expensive little bucket accessory for the rear of tank, and it's great ... haha.
5. Repaint:
Used a scotchbrite pad on clear coated areas and primed. Main tank and road wheels are ready for XF-88.
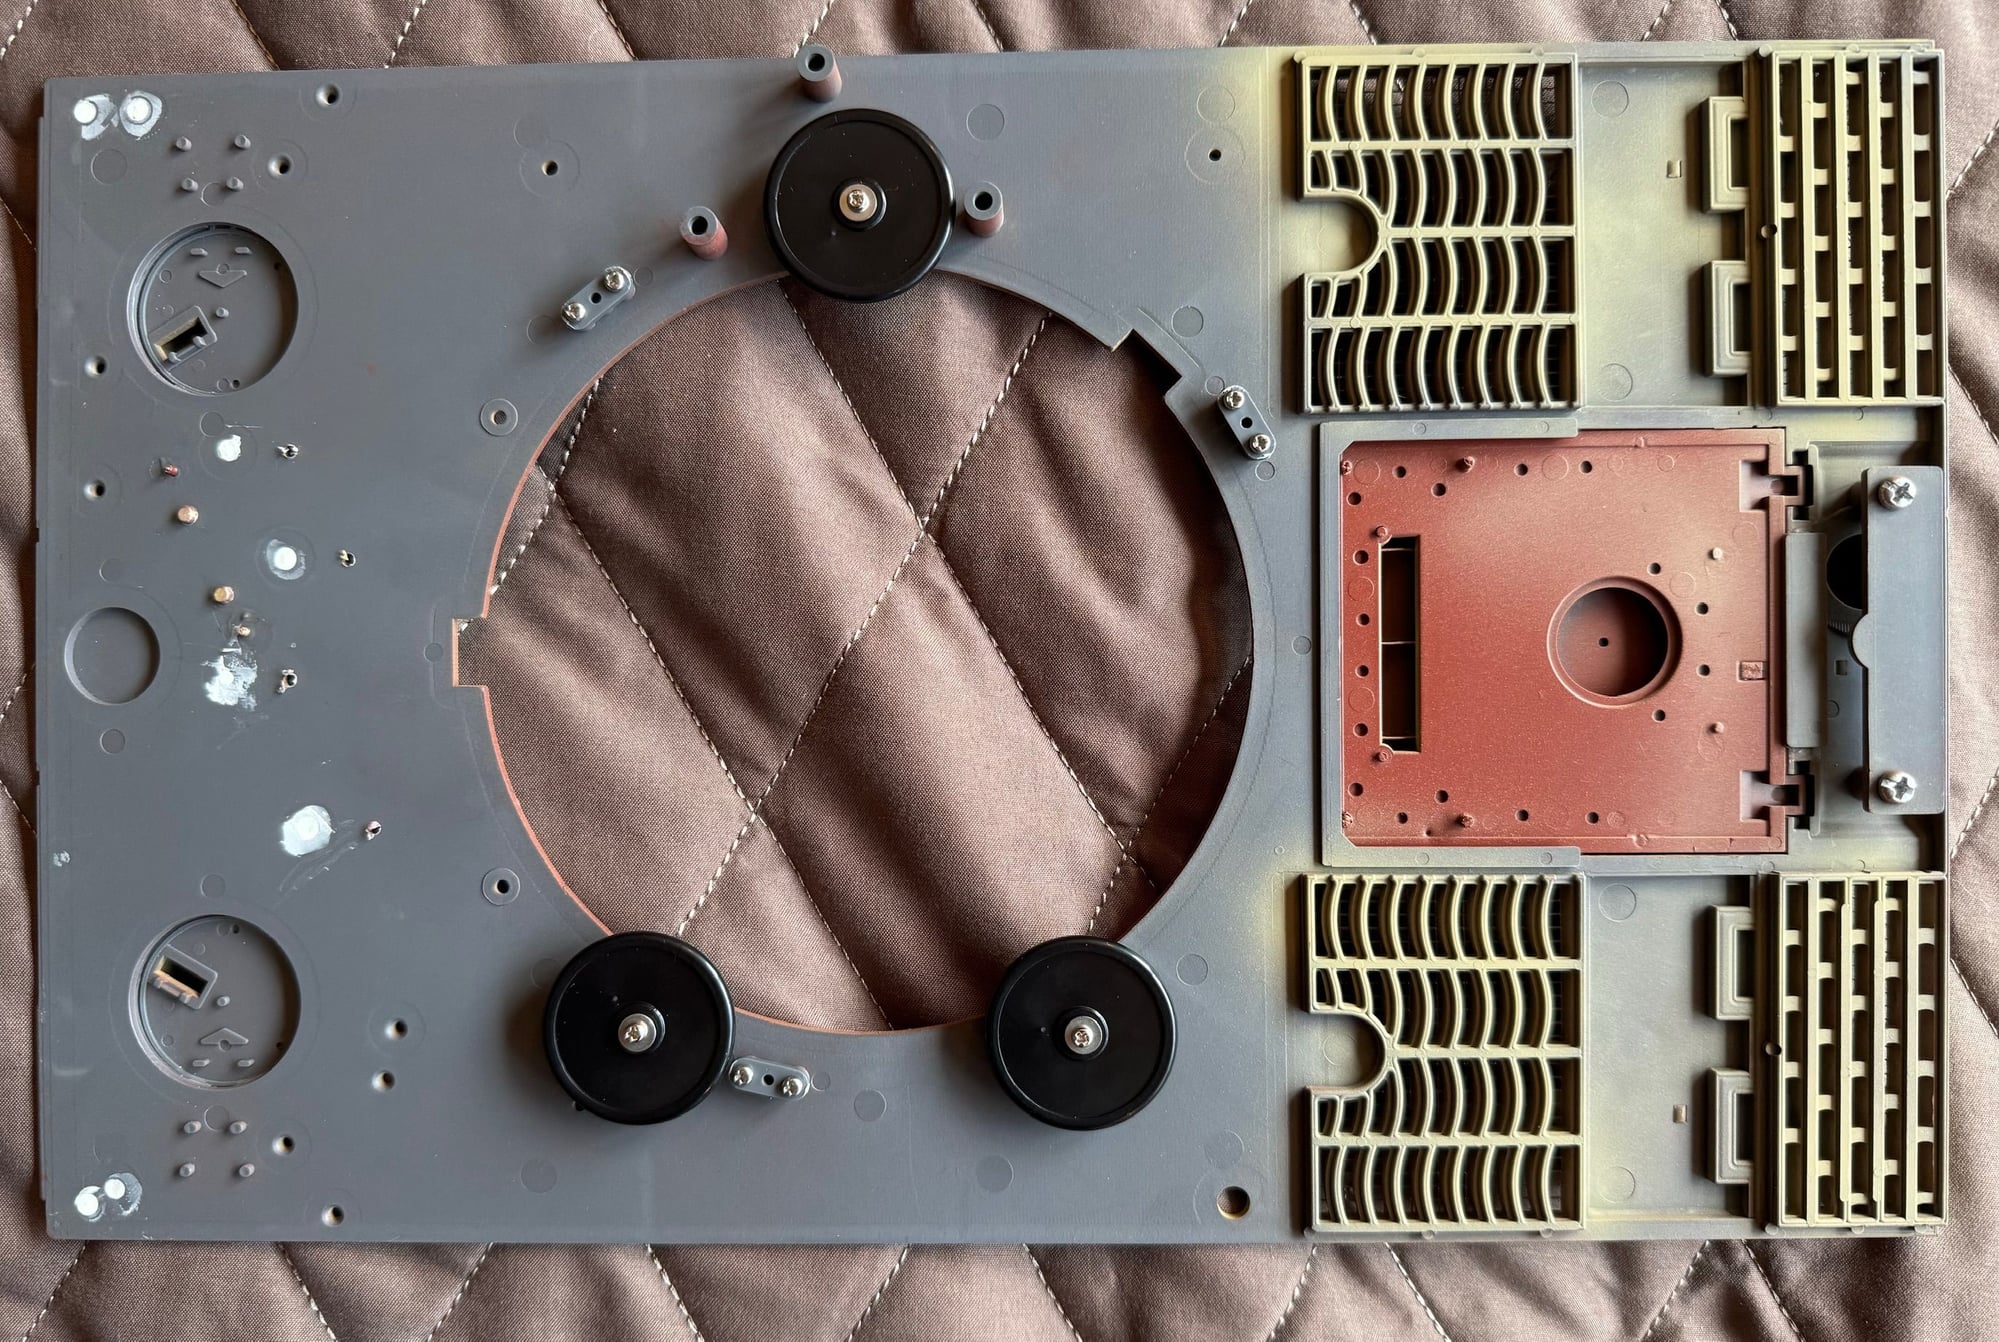
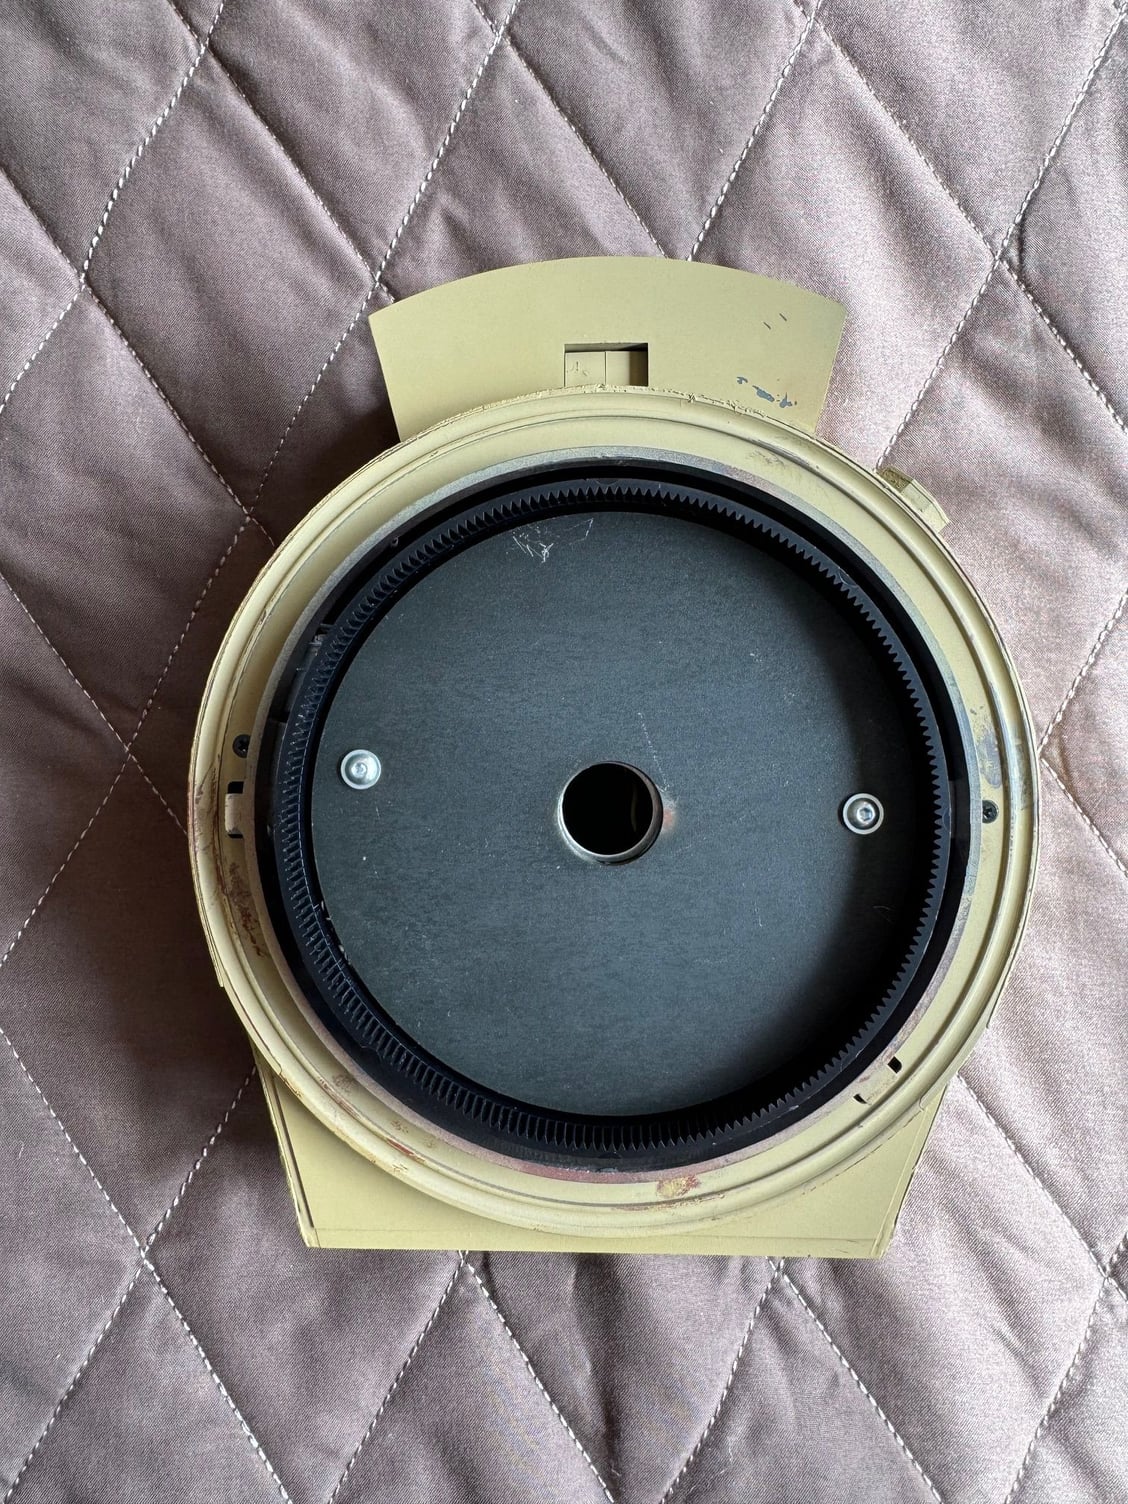
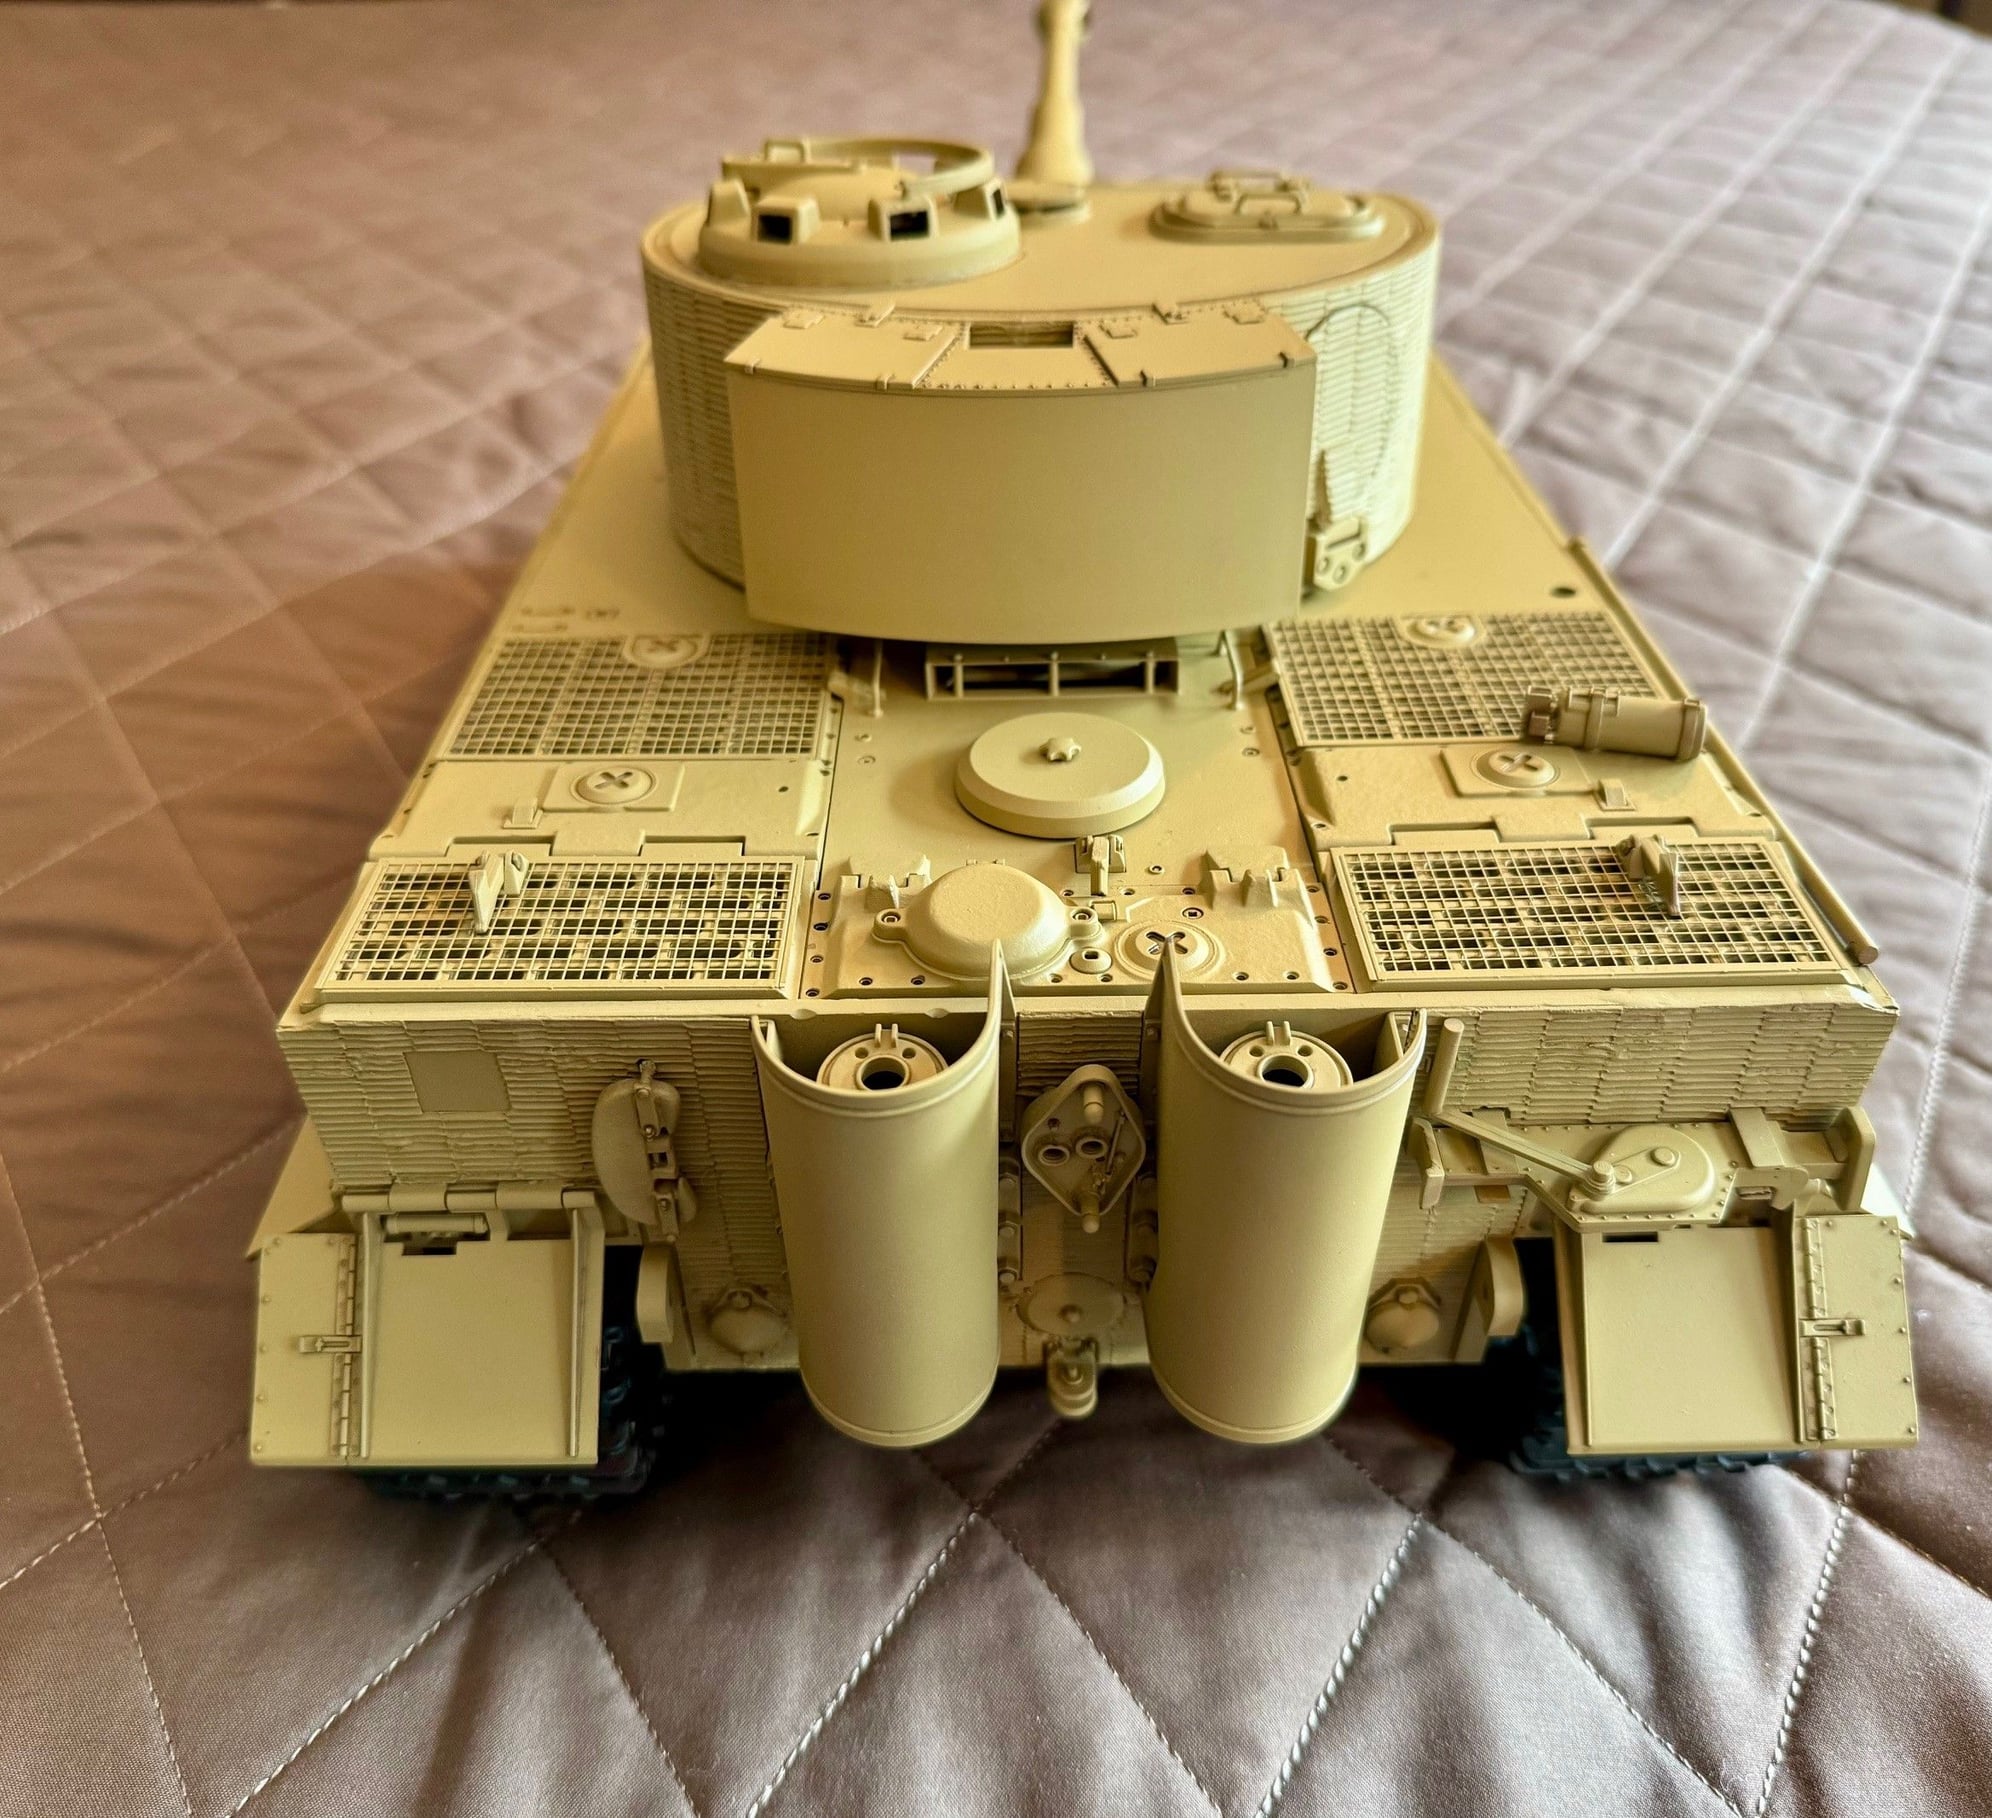
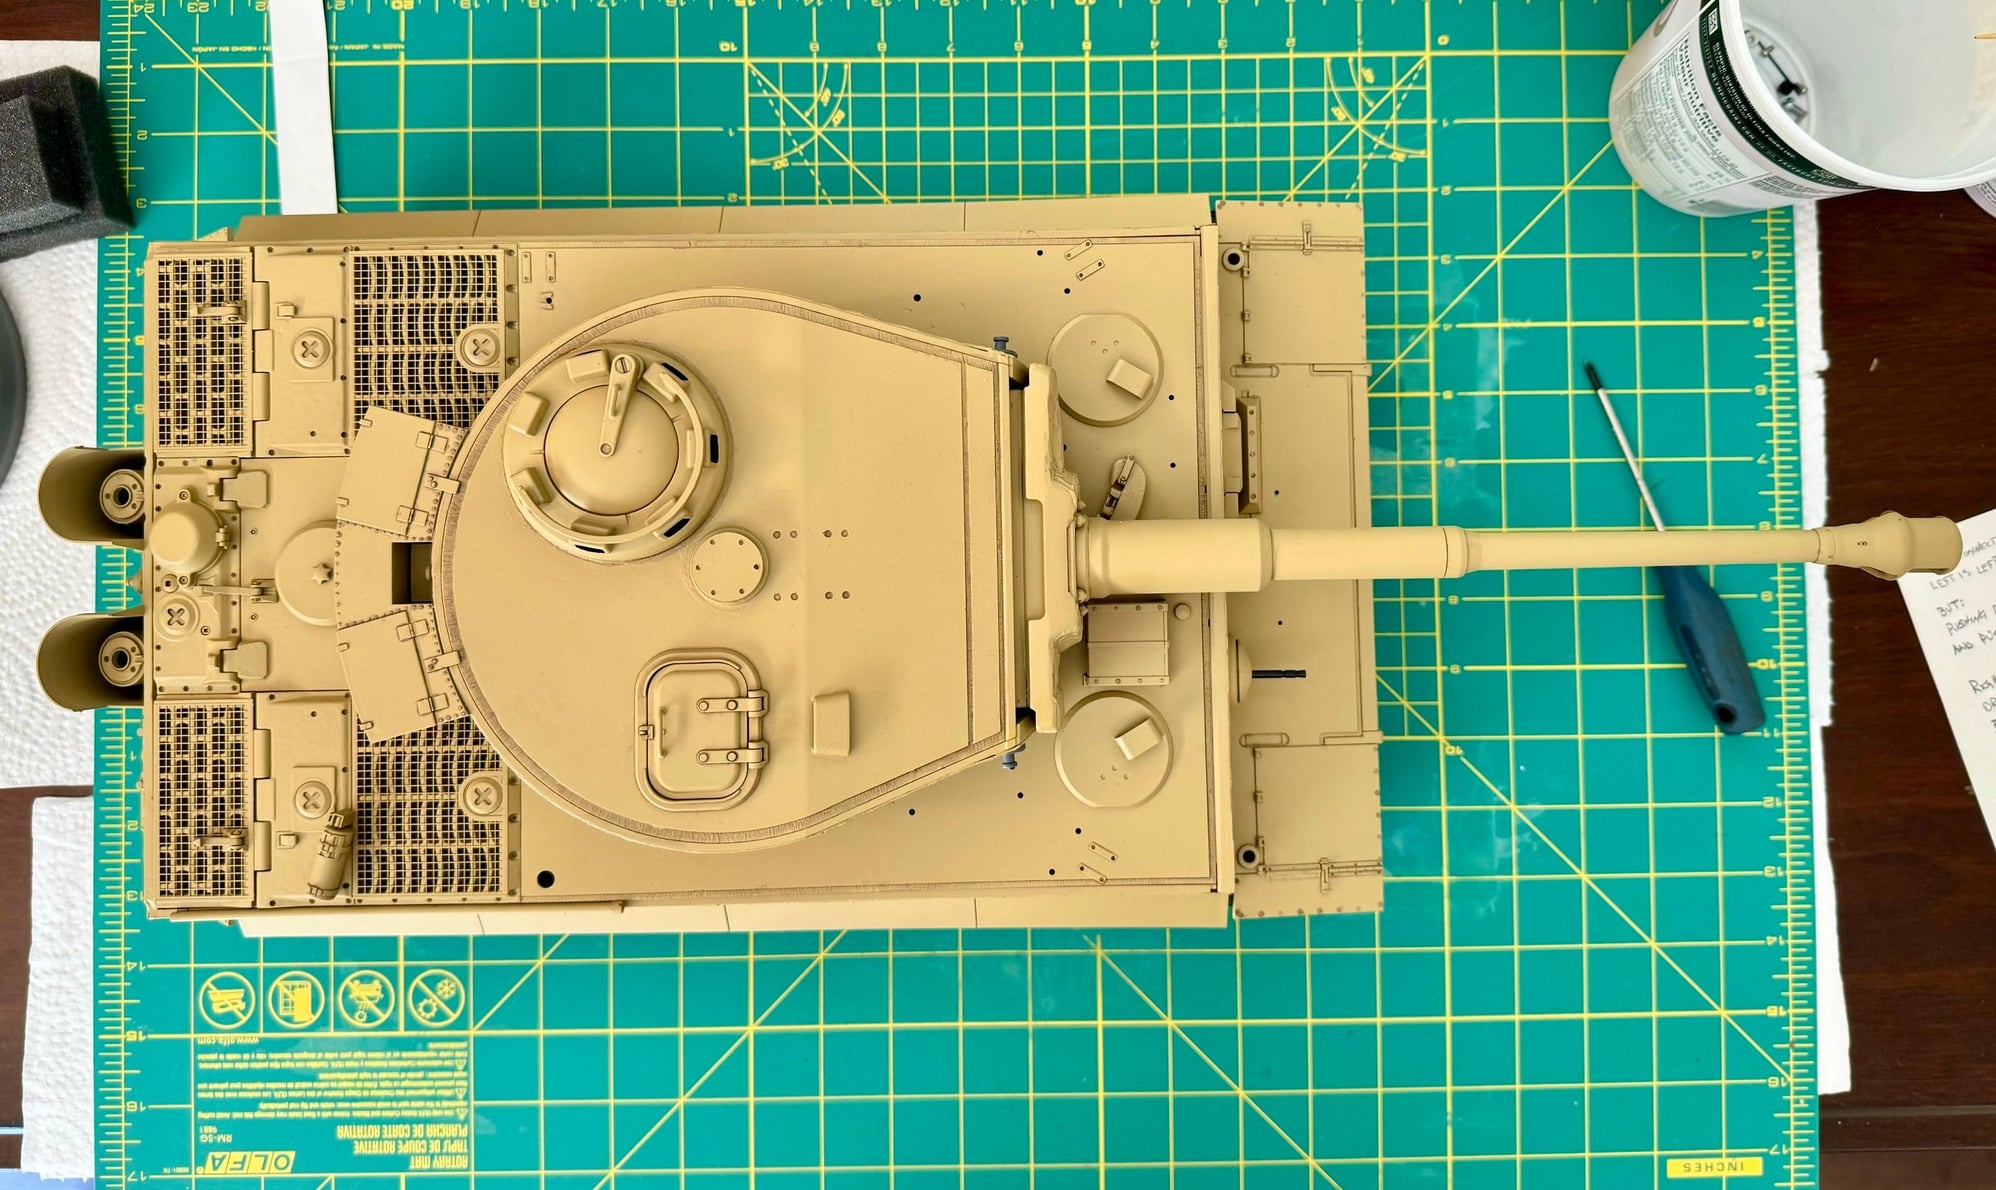
6.Tools, jacking block, cupola, vents, intake, etc. ... have been relocated and/or new parts, for a specific mid production version. There is a small area on rear of hull roof that isn't correct, but it's too difficult for me to change and I don't want to goof up the model. And happy with the rear deck screens purchase, and air intake part also looks good.
7. Zimmerit:
I like the Zimmerit kit I bought. I think it looks good. The gun mantlet area that came with the kit was not very detailed though, and so I did the zimmerit by hand, on the original Tamiya part.
8. Cables:
New detailed tow cables and fastening hardware look great, but haven't been able to find a similar kit for the track cable fasteners/clamps.
In summary:
Glad to have rebooted this project, and probably will ask some more questions here, when I get to a few stages of the build I'm not completely sure about
Dave
Still wanting a newer production version Tiger ... I found info about some mid production types with rubber wheels, in Normandy (SS 101st Heavy Tank Battalion). So started with that idea.
I looked back on this forum to figure out how long it's been since I last worked on this model. Turns out ... 4 years, yikes.
I got bogged down with too many unknowns and failure to find the exact parts I wanted. And so, got a bit frustrated and put the Tiger away in a couple of drawers. But, never completely forgot about it.
Recently got the urge to get going on it, and surprisingly figured out one problem ... but discovered a new one.
1. Gun barrel and muzzle brake:
I bought a great looking detailed barrel, but it wasn't hollow inside ... so no ability to install flash option. Also got a hollow version that came with a plastic muzzle brake.
Was thinking the solid barrel muzzle brake might fit on the hollow barrel with a bit of file work and some CA glue. It worked, so one problem sorted out.
but
2. Had previously painted road wheels and hull with XF-60, then flat clear coat. Instantly didn't like the color but didn't want to redo paint. A couple weeks ago, I watched a video about a build with XF-88 and like the look. Therefore, asked questions and thankfully got answers about how to redo the already painted areas.
3. Finding the exact parts:
Some parts I bought were less detailed than the original parts and so, didn't use them ... like tow shackles, and a few tools.
The vent (beside the commander's copula) I bought, looked goofy. The bottom section didn't look right. I removed it and separated the top part and used a washer for the bottom part. It still isn't right, (and a few other detail parts also) but I've decided to let some things go ... and just get on with the project.
4. Bucket:
Bought an expensive little bucket accessory for the rear of tank, and it's great ... haha.
5. Repaint:
Used a scotchbrite pad on clear coated areas and primed. Main tank and road wheels are ready for XF-88.
6.Tools, jacking block, cupola, vents, intake, etc. ... have been relocated and/or new parts, for a specific mid production version. There is a small area on rear of hull roof that isn't correct, but it's too difficult for me to change and I don't want to goof up the model. And happy with the rear deck screens purchase, and air intake part also looks good.
7. Zimmerit:
I like the Zimmerit kit I bought. I think it looks good. The gun mantlet area that came with the kit was not very detailed though, and so I did the zimmerit by hand, on the original Tamiya part.
8. Cables:
New detailed tow cables and fastening hardware look great, but haven't been able to find a similar kit for the track cable fasteners/clamps.
In summary:
Glad to have rebooted this project, and probably will ask some more questions here, when I get to a few stages of the build I'm not completely sure about
Dave
Last edited by dsbc; 06-03-2024 at 06:47 AM.
06-03-2024, 07:53 AM
#3

Completely interested in following this build...
Do you have a link to the work done so far (or 4 years ago)?
Can you expound on the main gun and muzzle brake? Pictures?
What zimmerit kit did you use? How did you do the zimmerit on the mantlet?
TIA
Do you have a link to the work done so far (or 4 years ago)?
Can you expound on the main gun and muzzle brake? Pictures?
What zimmerit kit did you use? How did you do the zimmerit on the mantlet?
TIA
06-03-2024, 09:39 AM
#4
1. I don't have any photos of previous work done, but the photos of what is done so far (at the beginning of this post), tell most of the story (when compared with the original box kit).
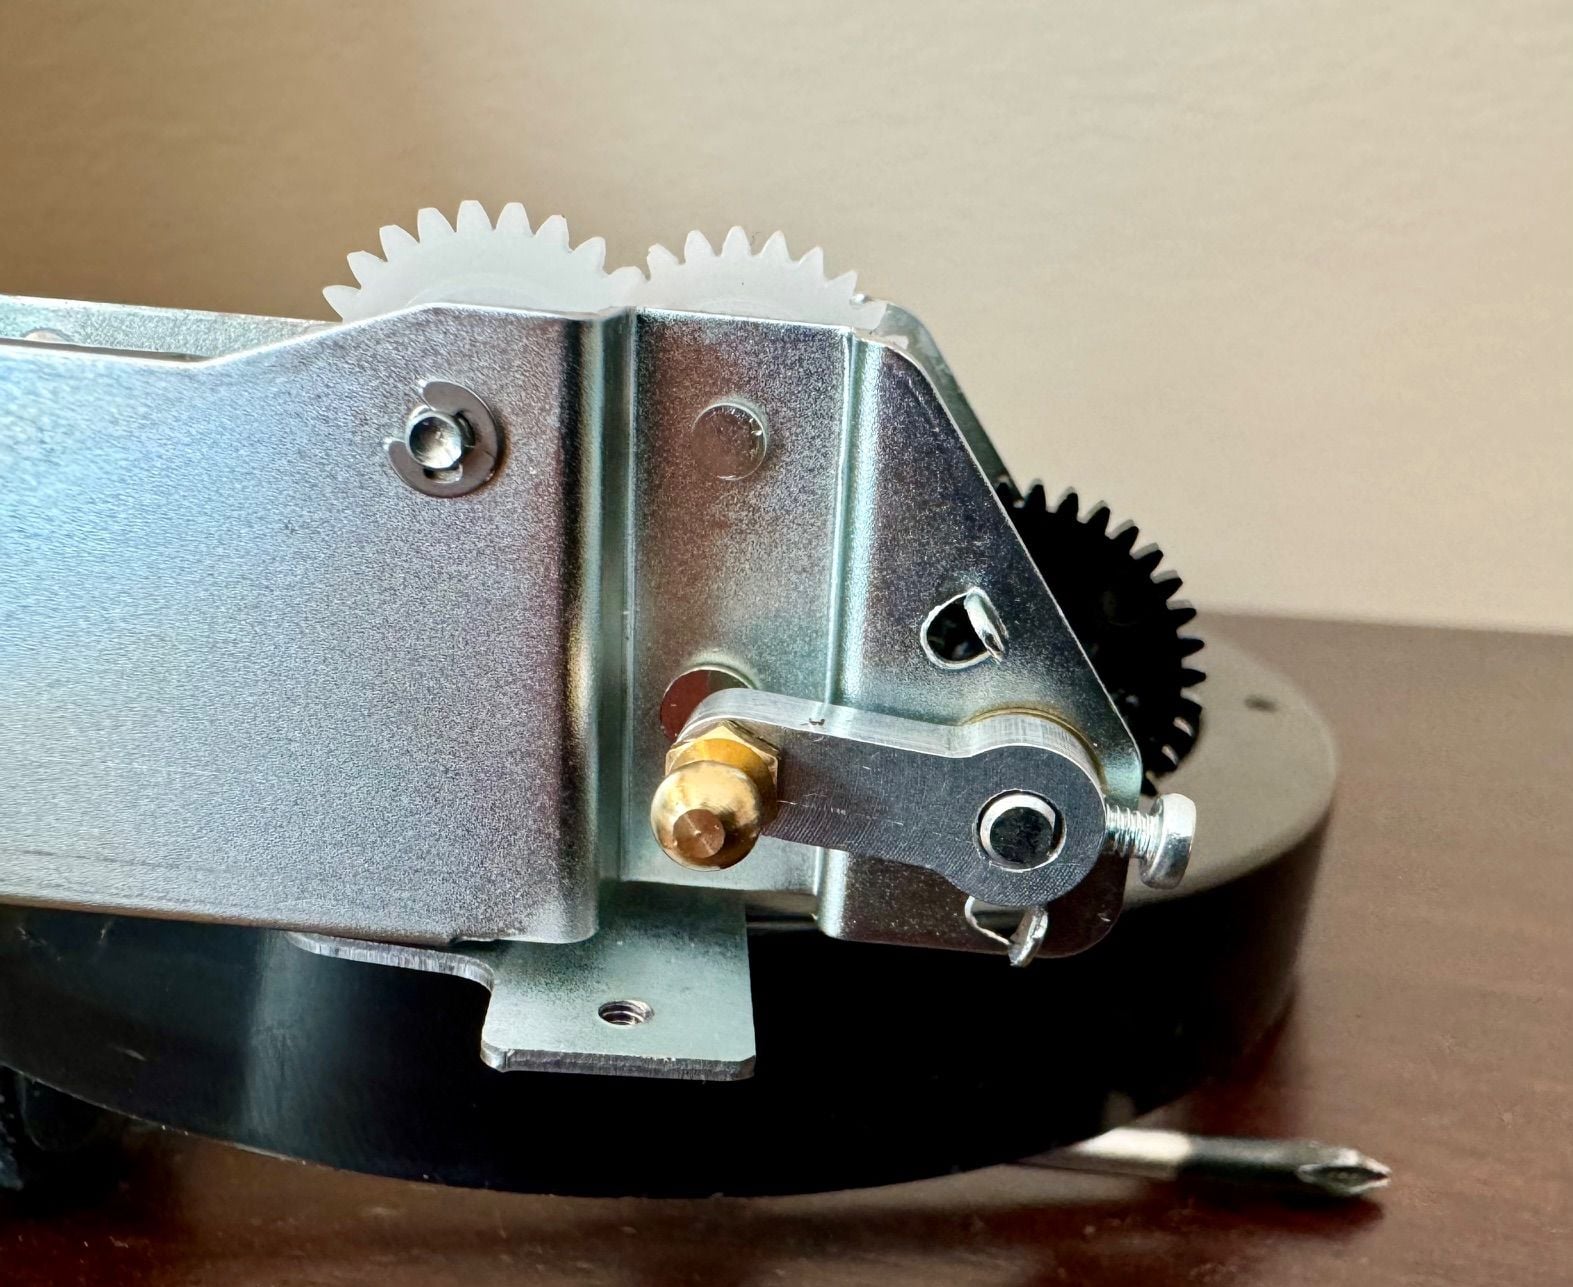
2. I'll attach a couple of photos of the barrel. It's made from two different barrel kits. I used a early version muzzle brake from a detailed barrel kit, and put it on the barrel of a hollow barrel kit.
I filed down the end of the barrel so that the muzzle brake would fit on, and then CA glued it to the barrel. I have the manufacture's box of the detail barrel kit at home ... I'll post a pic when I return from work.
3. I think I have the zimmerit info at home also. It's basically a zimmerit kit with the zimmerit panels on sheets that need to be applied with a special glue.
Last edited by dsbc; 06-03-2024 at 09:45 AM.
 06-05-2024, 11:47 AM
#7
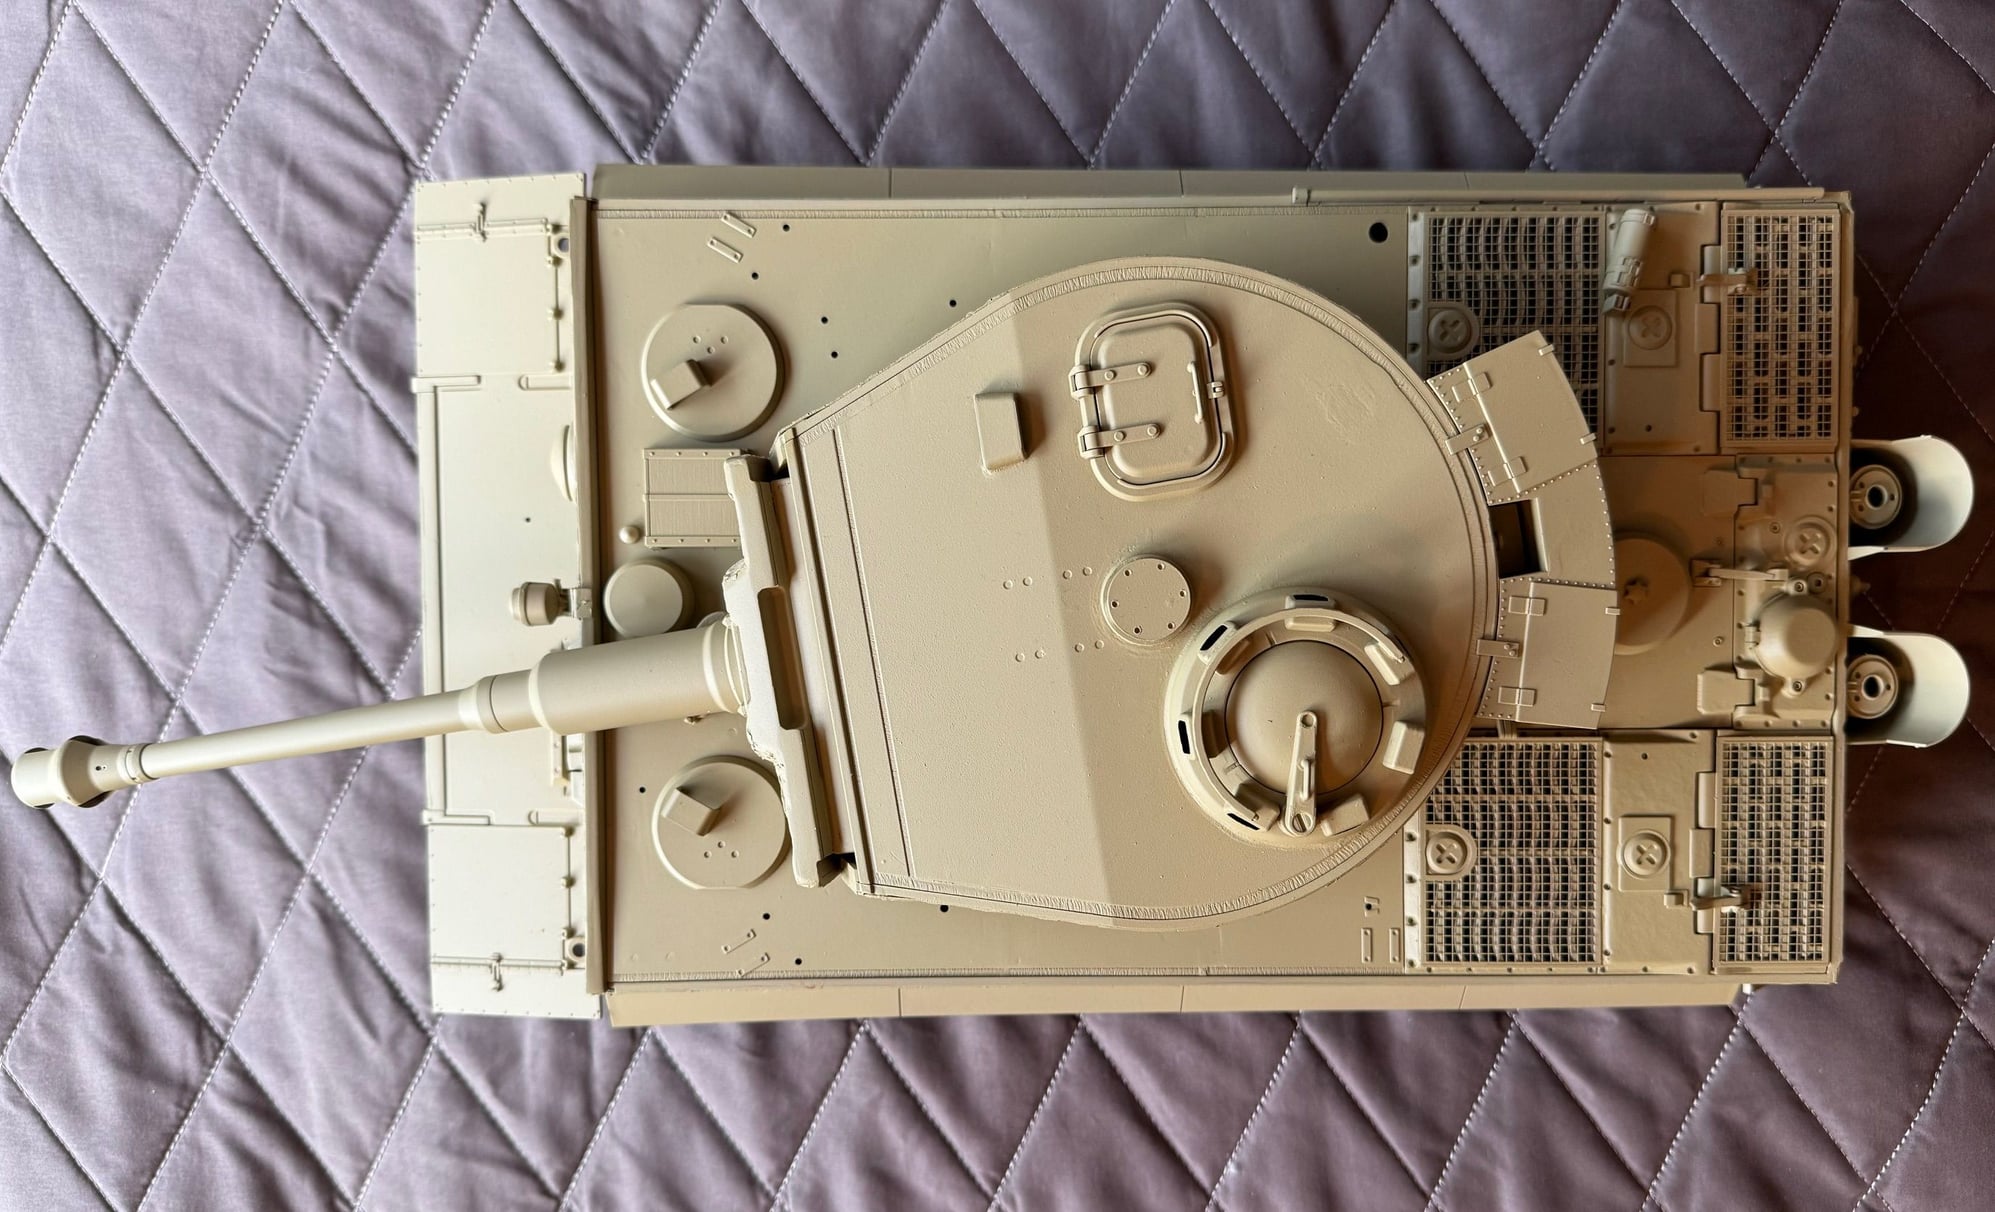
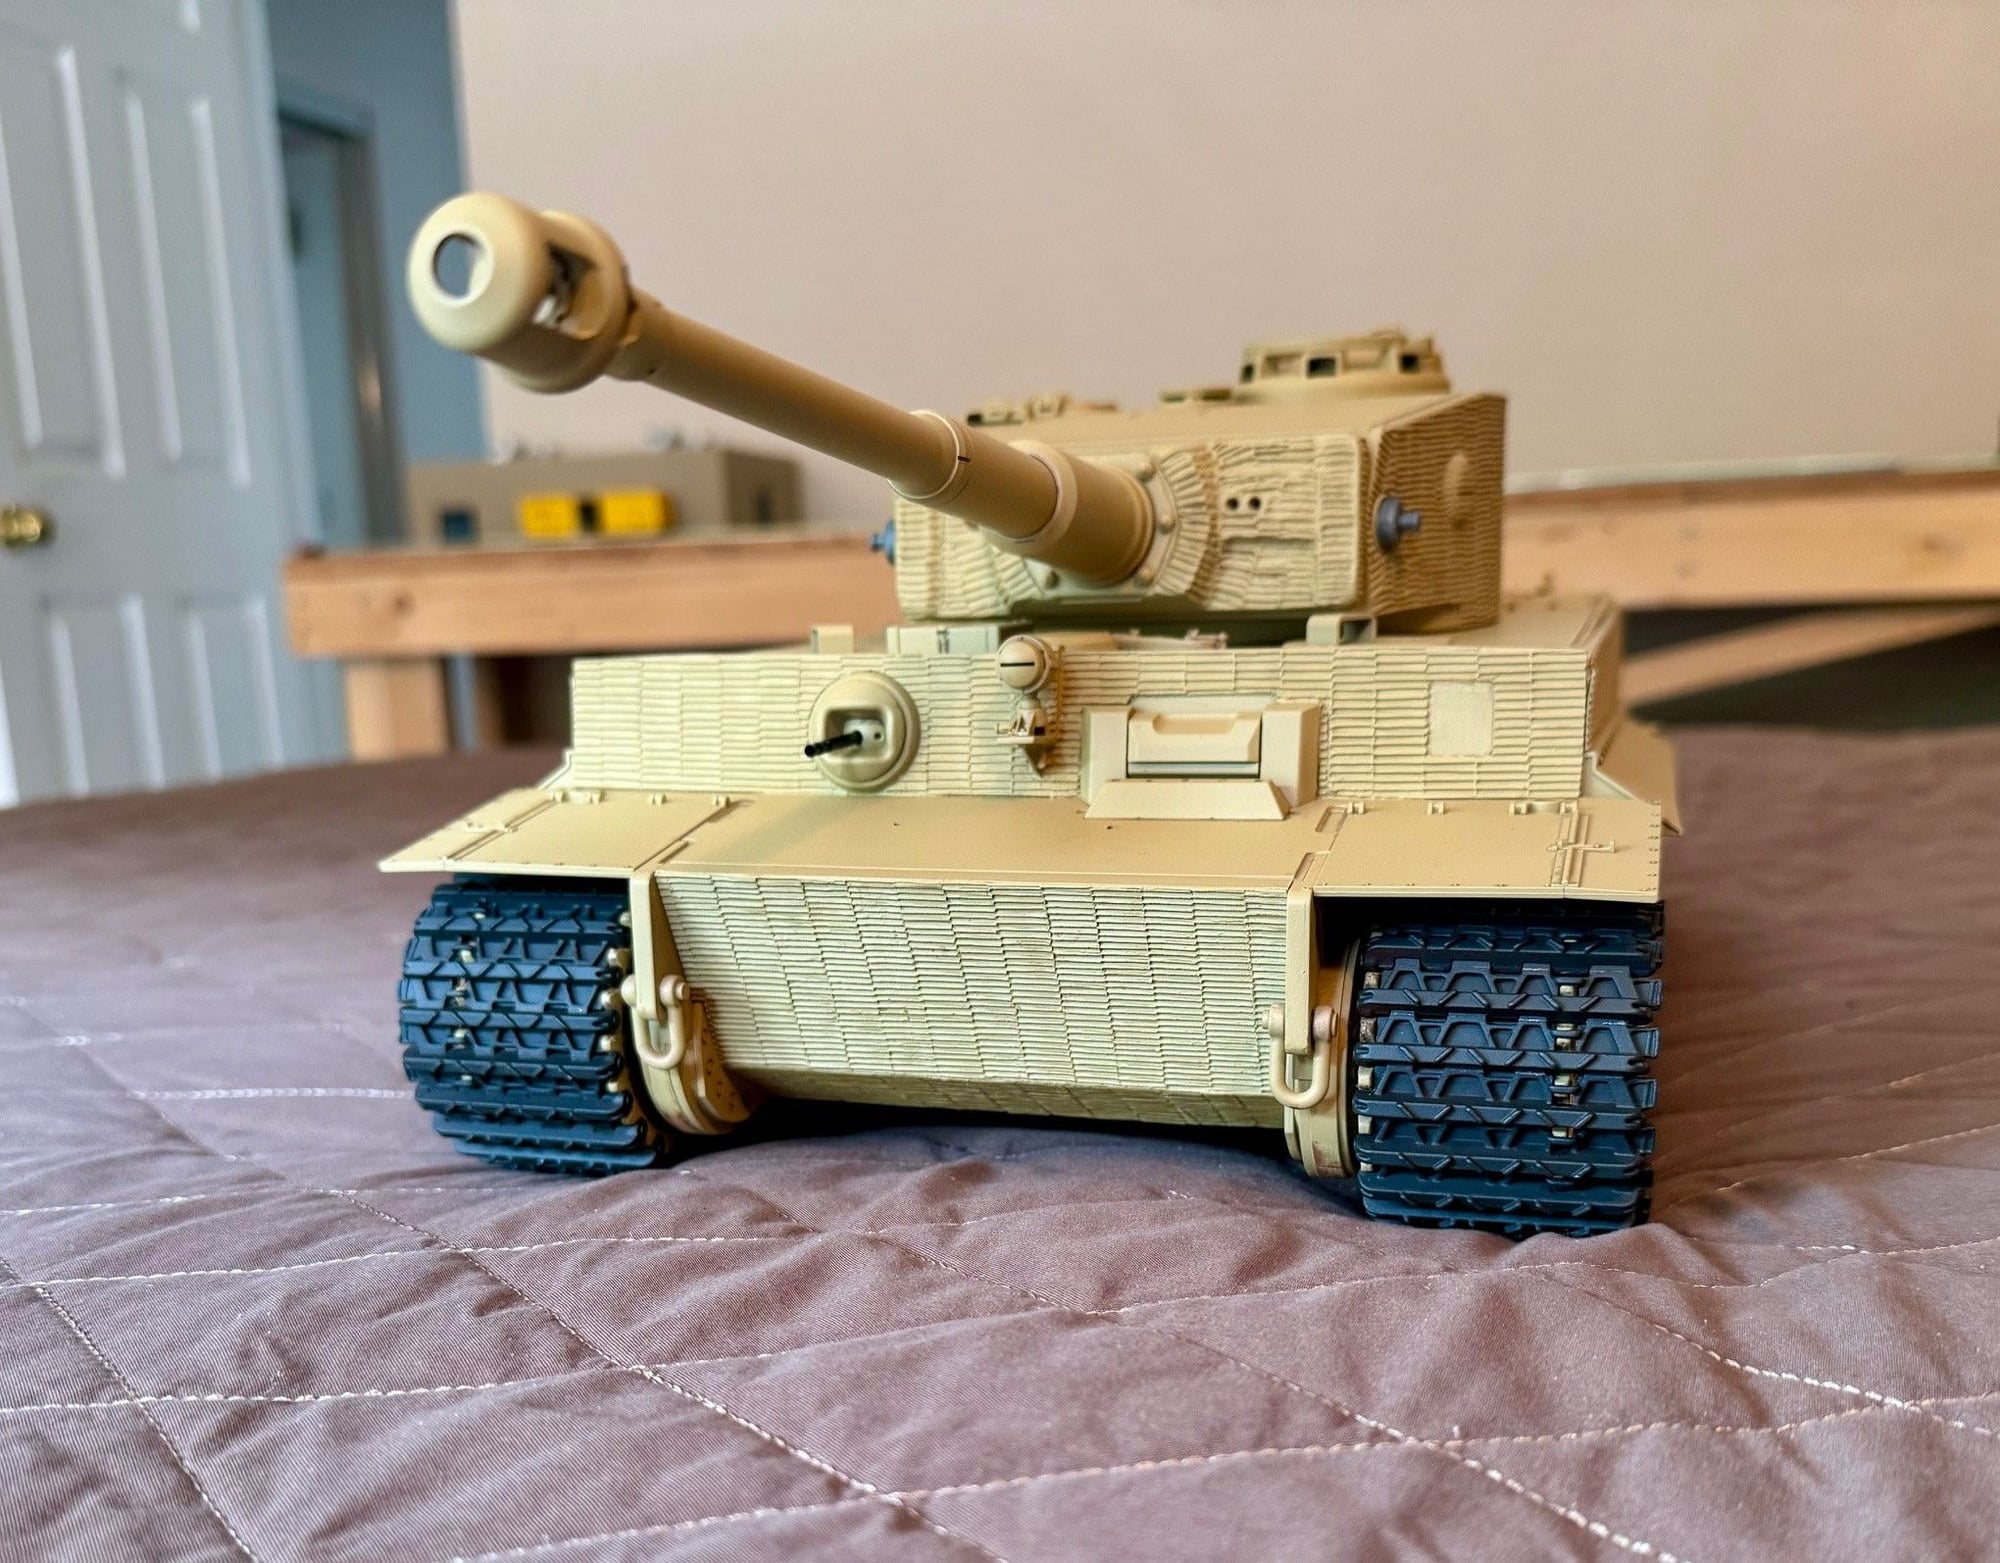
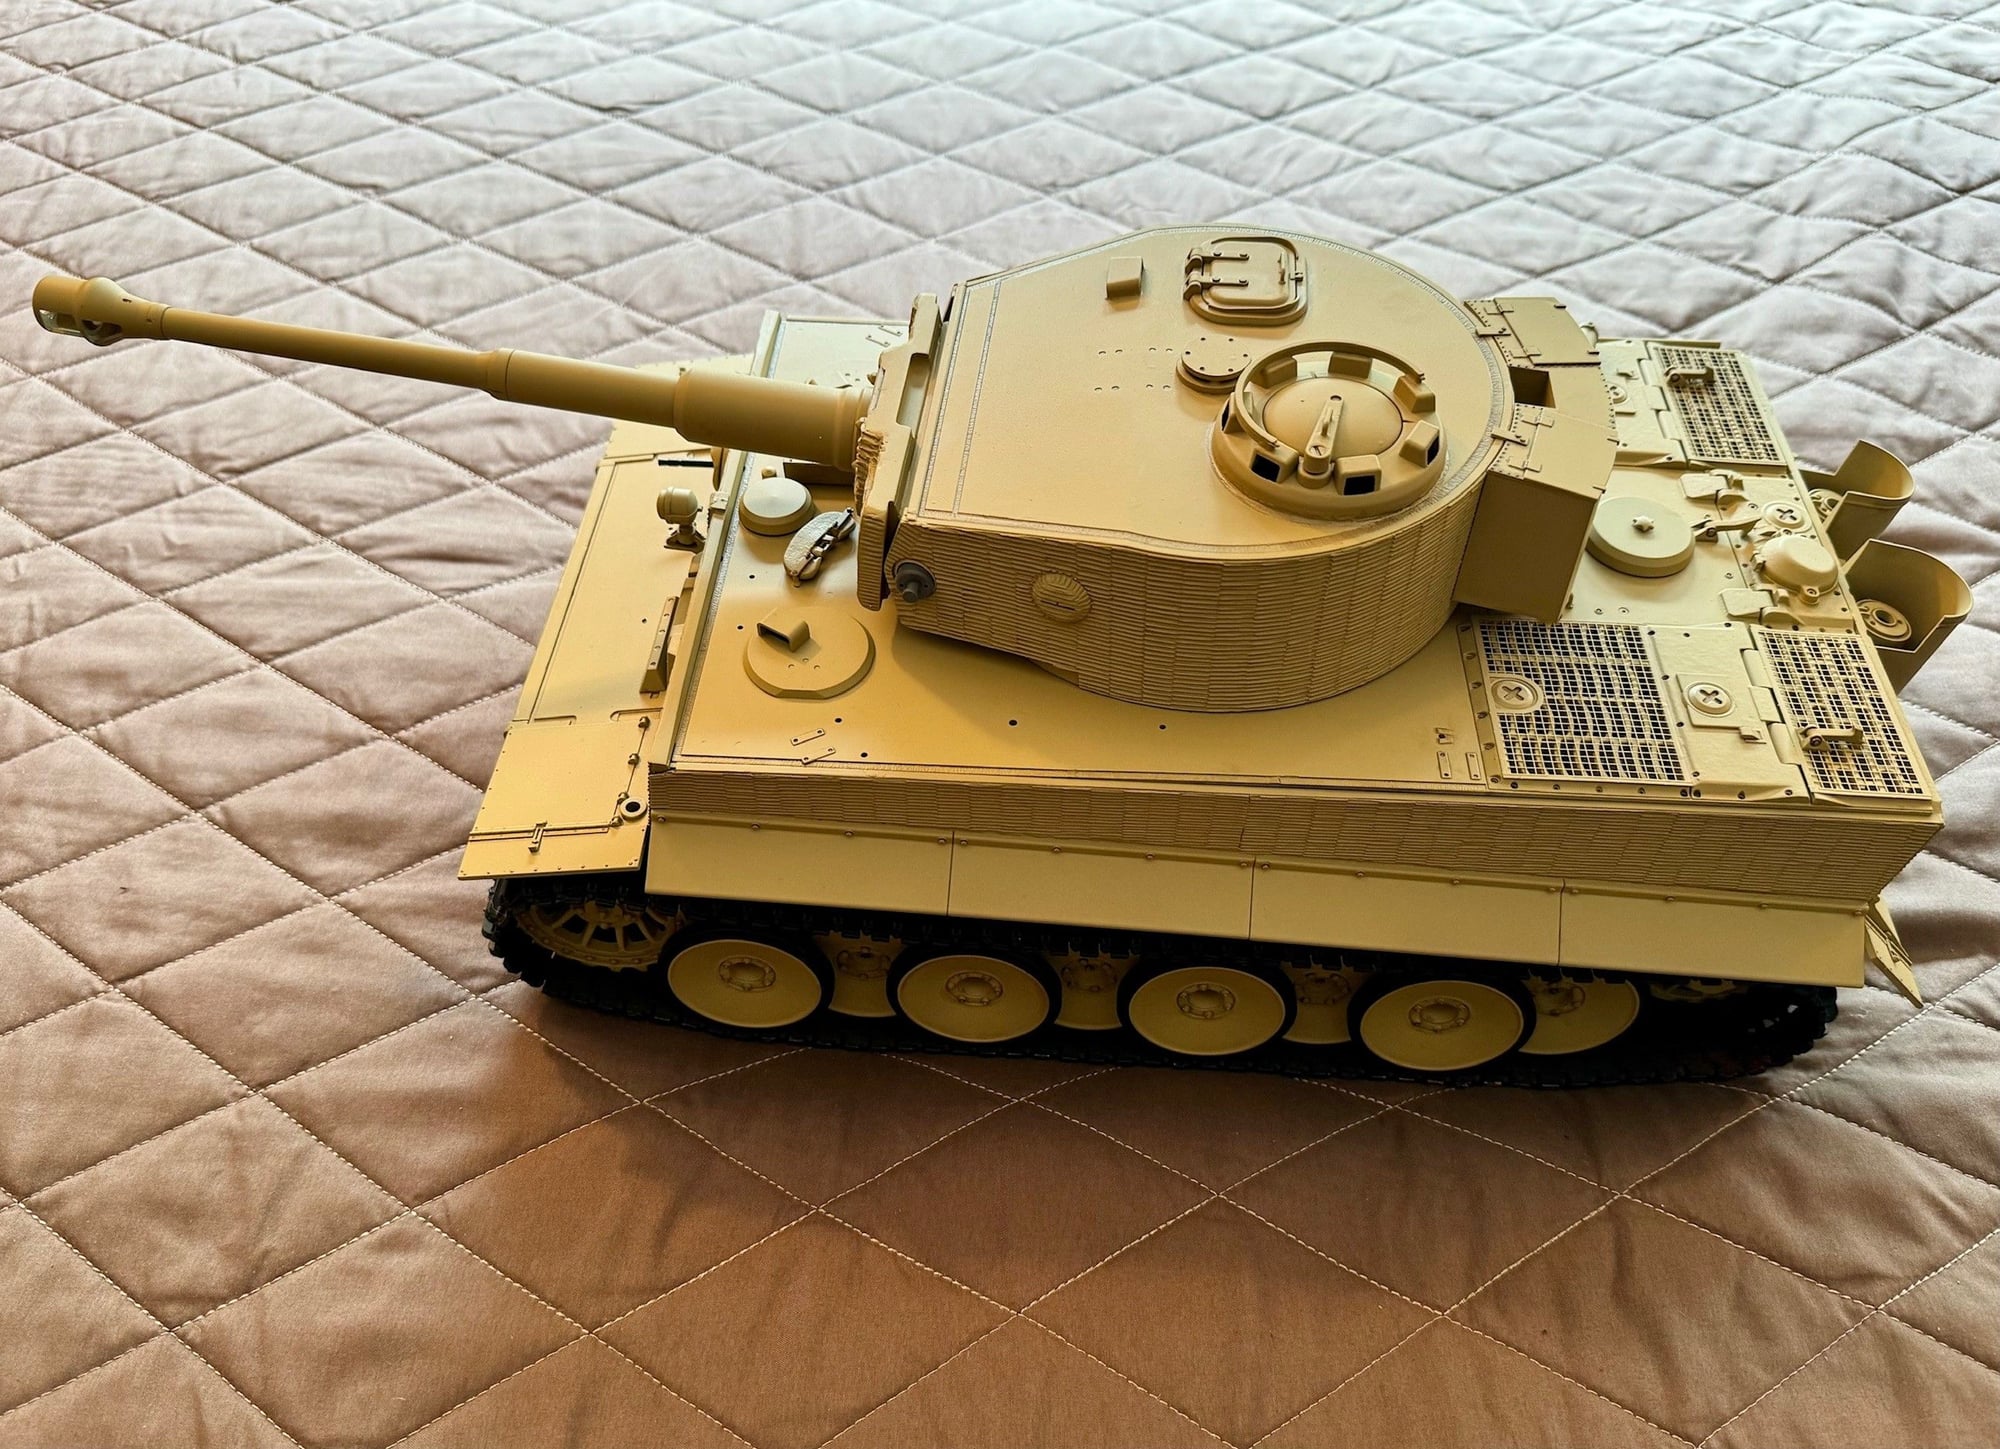
I�m not going to camo paint it.
Going with the idea that � this is one of the mid production Tigers delivered to SS 101st Heavy Tank Battalion in Normandy.
And it looked like this, just before getting camo paint and numbers.
Question about pin wash.
1. Do you think this model would look better with Tamiya panel line black pin wash effect?
2. if I use Tamiya panel line black � do I need to put more than one coat of Tamiya TS-80 flat clear coat? In order to protect the paint.
The following users liked this post:
dsbc (06-05-2024)
06-08-2024, 05:17 AM
#9
Was putting rubber on road wheels, and when all the rubber pieces were used � there was still one road wheel without rubber. Yikes.
i checked the areas where I had parts stored, etc � nothing.
i remembered I kept a bag of road wheel rubber packaging material, left over after the rubber was removed.
On my way to look for the bag, I recalled cleaning my room and drawers and throwing out a bunch of stuff, a couple of weeks earlier. And thinking the bag might have got tossed also.
i reached in the drawer, found the bag � went through all the old pieces and discovered I hadn�t removed one of the road wheel rubber pieces.
That was a close one, and a relief to find the missing part
06-08-2024, 05:43 AM
#10
As far as progress:
Put two coats of Tamiya TS-80 flat coat on entire model.
Installed rear idler support bushings.
Installed turret support system to under side of hull deck.
Airbrushed, black parts of tools, but when painting the brackets by brush � the paint dried too quickly. The result was a lumpy finish. So I removed all the fresh paint with thinner. And will airbrush the parts and mask for different colors.
 06-10-2024, 07:44 AM
#12
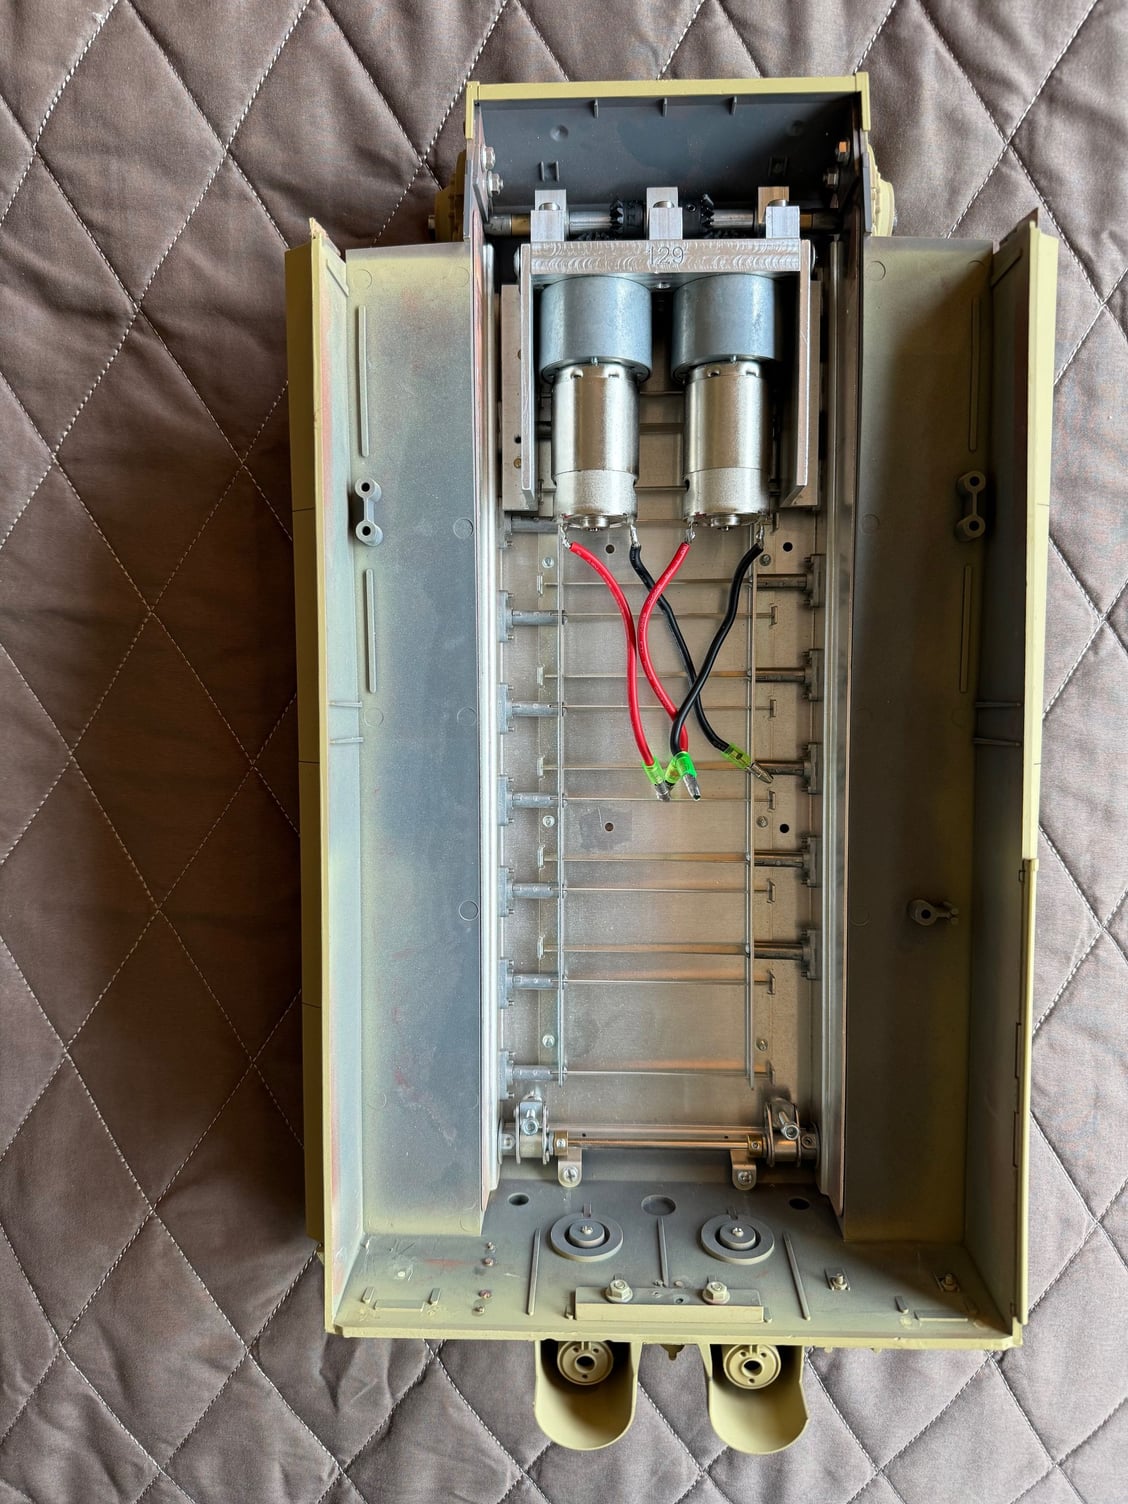
got the Tiger operational today.
Works great except for some controller transmitter stuff.
1. pushing joystick down, tank goes forward.
2. main gun fires with left trim control down, instead of up.
3. right trim control down causes tank to move.
4. can't get machine gun to fire.
next:
final details stuff like ... cables, tools, exhaust top cover parts, paint touch ups.
Really glad to finally have the Tiger in action
Last edited by dsbc; 06-10-2024 at 08:32 AM. Reason: accidentally deleted text when adding a new photo
The following users liked this post:
tankme (06-10-2024)
06-10-2024, 08:06 AM
#13

 06-18-2024, 11:13 AM
#16
Looks really good. Which tracks are those? Back long ago you could get the KT metal wheels and plastic parts - and make the later steel wheel version of the Tiger. Lots of work but looked good.
The zimmerit looks really good too. Nice looking Tiger!
Bob
The zimmerit looks really good too. Nice looking Tiger!
Bob
The following users liked this post:
tankme (06-18-2024)
 Yesterday, 05:41 PM
#18

1. pushing joystick down, tank goes forward.
2. main gun fires with left trim control down, instead of up.
3. right trim control down causes tank to move.
4. can't get machine gun to fire.
2. main gun fires with left trim control down, instead of up.
3. right trim control down causes tank to move.
4. can't get machine gun to fire.


