


PC-21 from WIND RC questions


 05-20-2024, 07:42 AM
#102

Thread Starter
One of my front cowl pins also broke. I bought identical replacements on Amazon. I then was able to dremel out the broken one and glue in a replacement.
 05-21-2024, 12:29 AM
#103

Hey everyone, got mine maidened. I have a total of 2 flights on it. Hopefully I can help everyone out with what I found on my pc-21 to help others with theres.
First impressions.....
1: This thing is huge and is very good quality.
2: The packaging in the crates is the best I have ever seen. Other companies like to wrap in bubble wrap, and stuff everything into as few boxes as they possibly can. Wind RC used 3 crates to package this plane. Everything had plenty of room inside so nothing was rubbing on eachother. Roy had an issue with the cockpit seat coming unglued from the cockpit floor and rubbing on the canopy. I didnt have this issue but it could very well happen to you. Also, please take Roys advice on making a system so your canopy doesnt go all the way over. I used a string method that can be taken on and off with ease. But over-all I was extremely impressed with everything else.
3: Loc-tite!!!! I got the plug and play version with servos and hardware installed. I went over all the hardware and servos and to my surprise everything was loc-tighted. (you dont find that much anymore).
4: Front pins to take off cowl. These pins are fragile. Dont know what kind of metal they are made of but my two front pins broke off trying to get the cowl off the first time. Now its a hassle to get cowl off. I have to take prop and spinner off in order to get cowl off now.
The assembly itself was pretty straight-forward as there is so much done for you. I would say the part that took the longest was turbine placement. I am using the kingtech k-100TP. I saw pictures of other builds and it looked like no modifications or very light modifications where done to get the turbine installed. Mine required quite a bit of dremeling and shimming to get it to line-up. But once enough customizing was done it fit great and looks very clean. I am huge on spinner/cowl spacing and centering and mine is spot-on.
The fuel tank was not an issue but I elected to take it out which is a nightmare. I took out the Wind Rc plug, line, and clunk and replaced with my own style. I used leftover pieces I had from other birds. I do plan on putting a second tank in but will wait a little while longer to do that.
Issues!!!
The two big issues I have had on this plane are the retracts and brakes. The retracts themselves work fine, but the struts on mine dont extend back to the full down position when there is no weight on the aircraft. This prevents the gear going into there wheel wells correctly when being retracted. I know there is a trick where you can install wood dowels to compress the springs a bit more. I have done this but on my second flight the right main still didnt fully retract. So I will need to go in and make the dowel a bit longer.
The brakes are another issue that although my plane stopped before going off the edge of the runway it got close.
Here is an example:
My runway is 700 feet long. I landed 50-100 feet after the beginning of the runway and went to full pulsating brakes. It came to a stop about 75 feet before the opposite side of the runway. That is way to long. I landed at a nice slow speed as well. Fred from Wind RC says he has new brake hubs and I will end up ordering them in the coming weeks and hopefully those help.
Flight characteristics are awesome. I have 32 degrees of flaps and she comes in nice and slow and predictable.
But overall I am very impressed with this plane. I would recommend it to anyone wanting a very peaceful, predictable aircraft to add to there hangar.
Any questions, please ask.
I do this with all systems that use that sticky grease...
05-30-2024, 11:57 AM
#104
Thread Starter
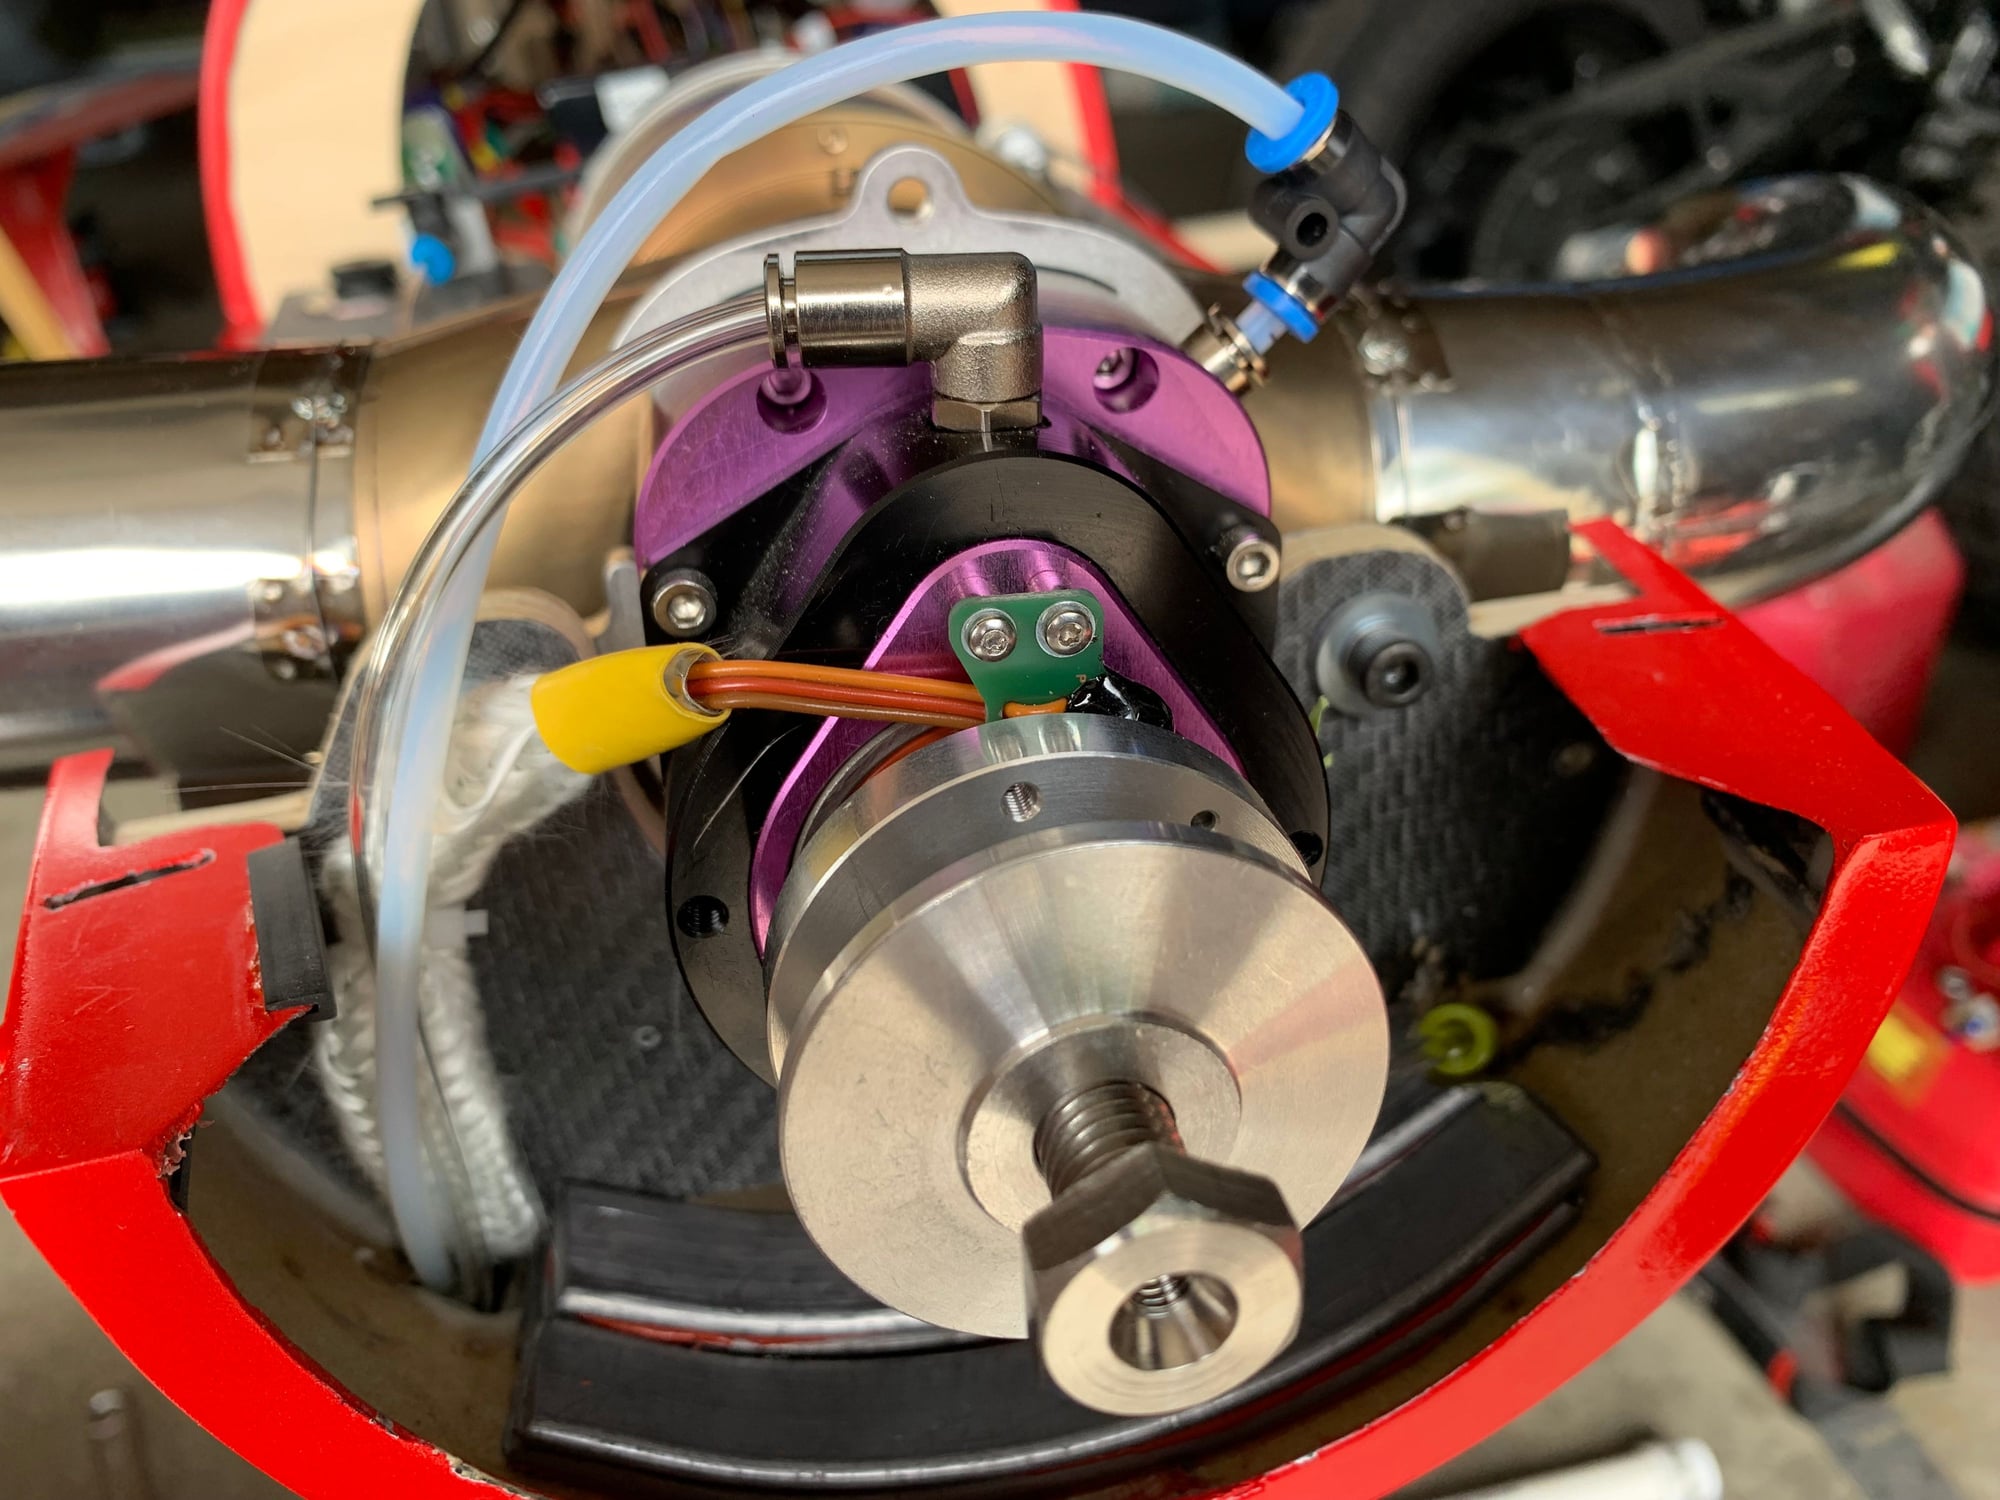
Jetcat SPT10 installation. Duck decoy weights in bottom of nose to adjust CG. As per Danny Diaz helpful recommendations ran all lines underneath and shielded with fiberglass heat shields from McMaster and also wrapped those aluminum tape.

Top photo with stopcock, fuel filter, dry lock fuel fill. Hopefully I have ECU and jetcat telemetry module properly programmed to my JETI transmitter. Next step , get my buddies to assist with run up
05-30-2024, 12:30 PM
#105
Thread Starter
Wondering if anyone has had issues with shielding of GPS sensor for ground speed in the airframe? Looks like the fuselage may have a thin layer of carbon fiber that is then covered on the inside with airex. I�m installing a GPS sensor and looking for an appropriate spot for the installation

The following users liked this post:
BadBill (06-14-2024)
06-17-2024, 06:02 AM
#110
Thread Starter
David, the model was flown 3 X this weekend all without the cockpit. The nose weight is 32 ounces of lead with CG dead on at 220cm. Ali thought it was a little nose heavy and thought that 4-8 ounces could be removed. I�m planning to remove 8 ounces and see where it balances at so a reference is established when the cockpit goes in.
The first 2 flights uneventful. On 3rd flight gear amped out just as wheels were entering wheel wells. On landing the brakes faded and the model kept running down the runway. Surprisingly on taxi back that start to work again to some degree.
the most frustrating aspect of the 3rd flight was the cowl. When the model was first unpackaged I could not get the the right front cowl pin to move. I thought maybe it was accidentally glued or stuck to paint. While trying to retract it the pin broke off. I had to dremel it out and found identical latch pins on Amazon. I glued a new one in place. After all the flights I would release the cowl while the turboprop was cooling and I was not using a leaf blower to cool the turboprop. On 3rd flight as I tried to remove the cowl the left front cowl latch broke with only very little pressure being put on it. As a consequence I was only able to free up 2 of the 3 latches and was trying to release the broken latch. To my horror , as I�m trying to figure out how to release the broken latch, the paint on the top of the cowl started to blister. Clearly 3 layers of BVM heat shield was not enough.
so current plan is to replace the retract/brake controller with a LG15. I will now add a gyro now that the model is trimmed out and will post my throws later. I�m looking at other hatch latches to replace the front 2, maybe BVM latches. For the time being will live with the cowl blemishes. They are difficult to see from 5 feet away but pretty easy to see from 12 inches away. At some point I will consider repainting the cowl.
The model has great presence in the air and is a nice flyer. Frustrating dealing with issues during our flying season
06-17-2024, 06:24 AM
#111
Junior Member
Roy I had the same thing happen I ordered new pin as they screw out and wasn�t aware. I also put the new gear controller and only got to test as my tank had a leak. Hopefully my next flight will be uneventful
06-17-2024, 09:43 AM
#112
Thread Starter
So sportflyer, did you replace the OEM retract controller with a Xicoy? If so what amp settings did you go with?
I didn�t realize till your post the pins are screwed in. So the question is would you trust those latches after red loctite the pins in place?
I didn�t realize till your post the pins are screwed in. So the question is would you trust those latches after red loctite the pins in place?
The following users liked this post:
sportflya2 (06-17-2024)
06-17-2024, 03:28 PM
#114
My Feedback: (15)
Thanks for the information. I tried the BVM heat stuff to protect the engine hatch cover on my Skymaster PC-21, but had to the remove the hatch immediately after engine shut down. On my last SM PC-21, I used carbon felt welding blanket (EBAY) to protect the engine cover. It seemed to work much better than the BVM heat shield. I do have the welding blanket stuff attached to the engine hatch on my WindRc PC-21.
Anyway, looking forward to getting my plane in the air.
Anyway, looking forward to getting my plane in the air.
06-18-2024, 08:04 AM
#117
Thread Starter
So in summation seems better heat insulation is needed for the cowl and maybe consider a leaf blower but the latter raises concerns about blowing hot air into the airframe at the expense of cooling the cowl hatch.
also sounds like mandatory to unscrew all latch pins and red loctite them in place.
In addition if one wants reliable retraction cycles and brakes move to a LG15. According to thread posted on the LG15 need to use a voltage regulator set to 7.5 volts to power the LG15
also sounds like mandatory to unscrew all latch pins and red loctite them in place.
In addition if one wants reliable retraction cycles and brakes move to a LG15. According to thread posted on the LG15 need to use a voltage regulator set to 7.5 volts to power the LG15


