


GP Super Sportster build
 06-04-2024, 12:54 PM
#26

Very Classic/nostalgic look to it with that cream color..
Would look real cool with an open cockpit windshield and an appropriate pilot with goggles and maybe a little scarf.
Would look real cool with an open cockpit windshield and an appropriate pilot with goggles and maybe a little scarf.
 06-11-2024, 01:10 AM
#27
Canopy gluing... That's a stressing thing! I feel everything that has to be glued after covering is stressful as running glue would easily damage a nice covering result.
The canopy did not have a perfect fit. Needed to be held down a bit and sides pushed in during curing. Clamps and tape would not be the best due to its weight and tape would just mess up the glue and covering.
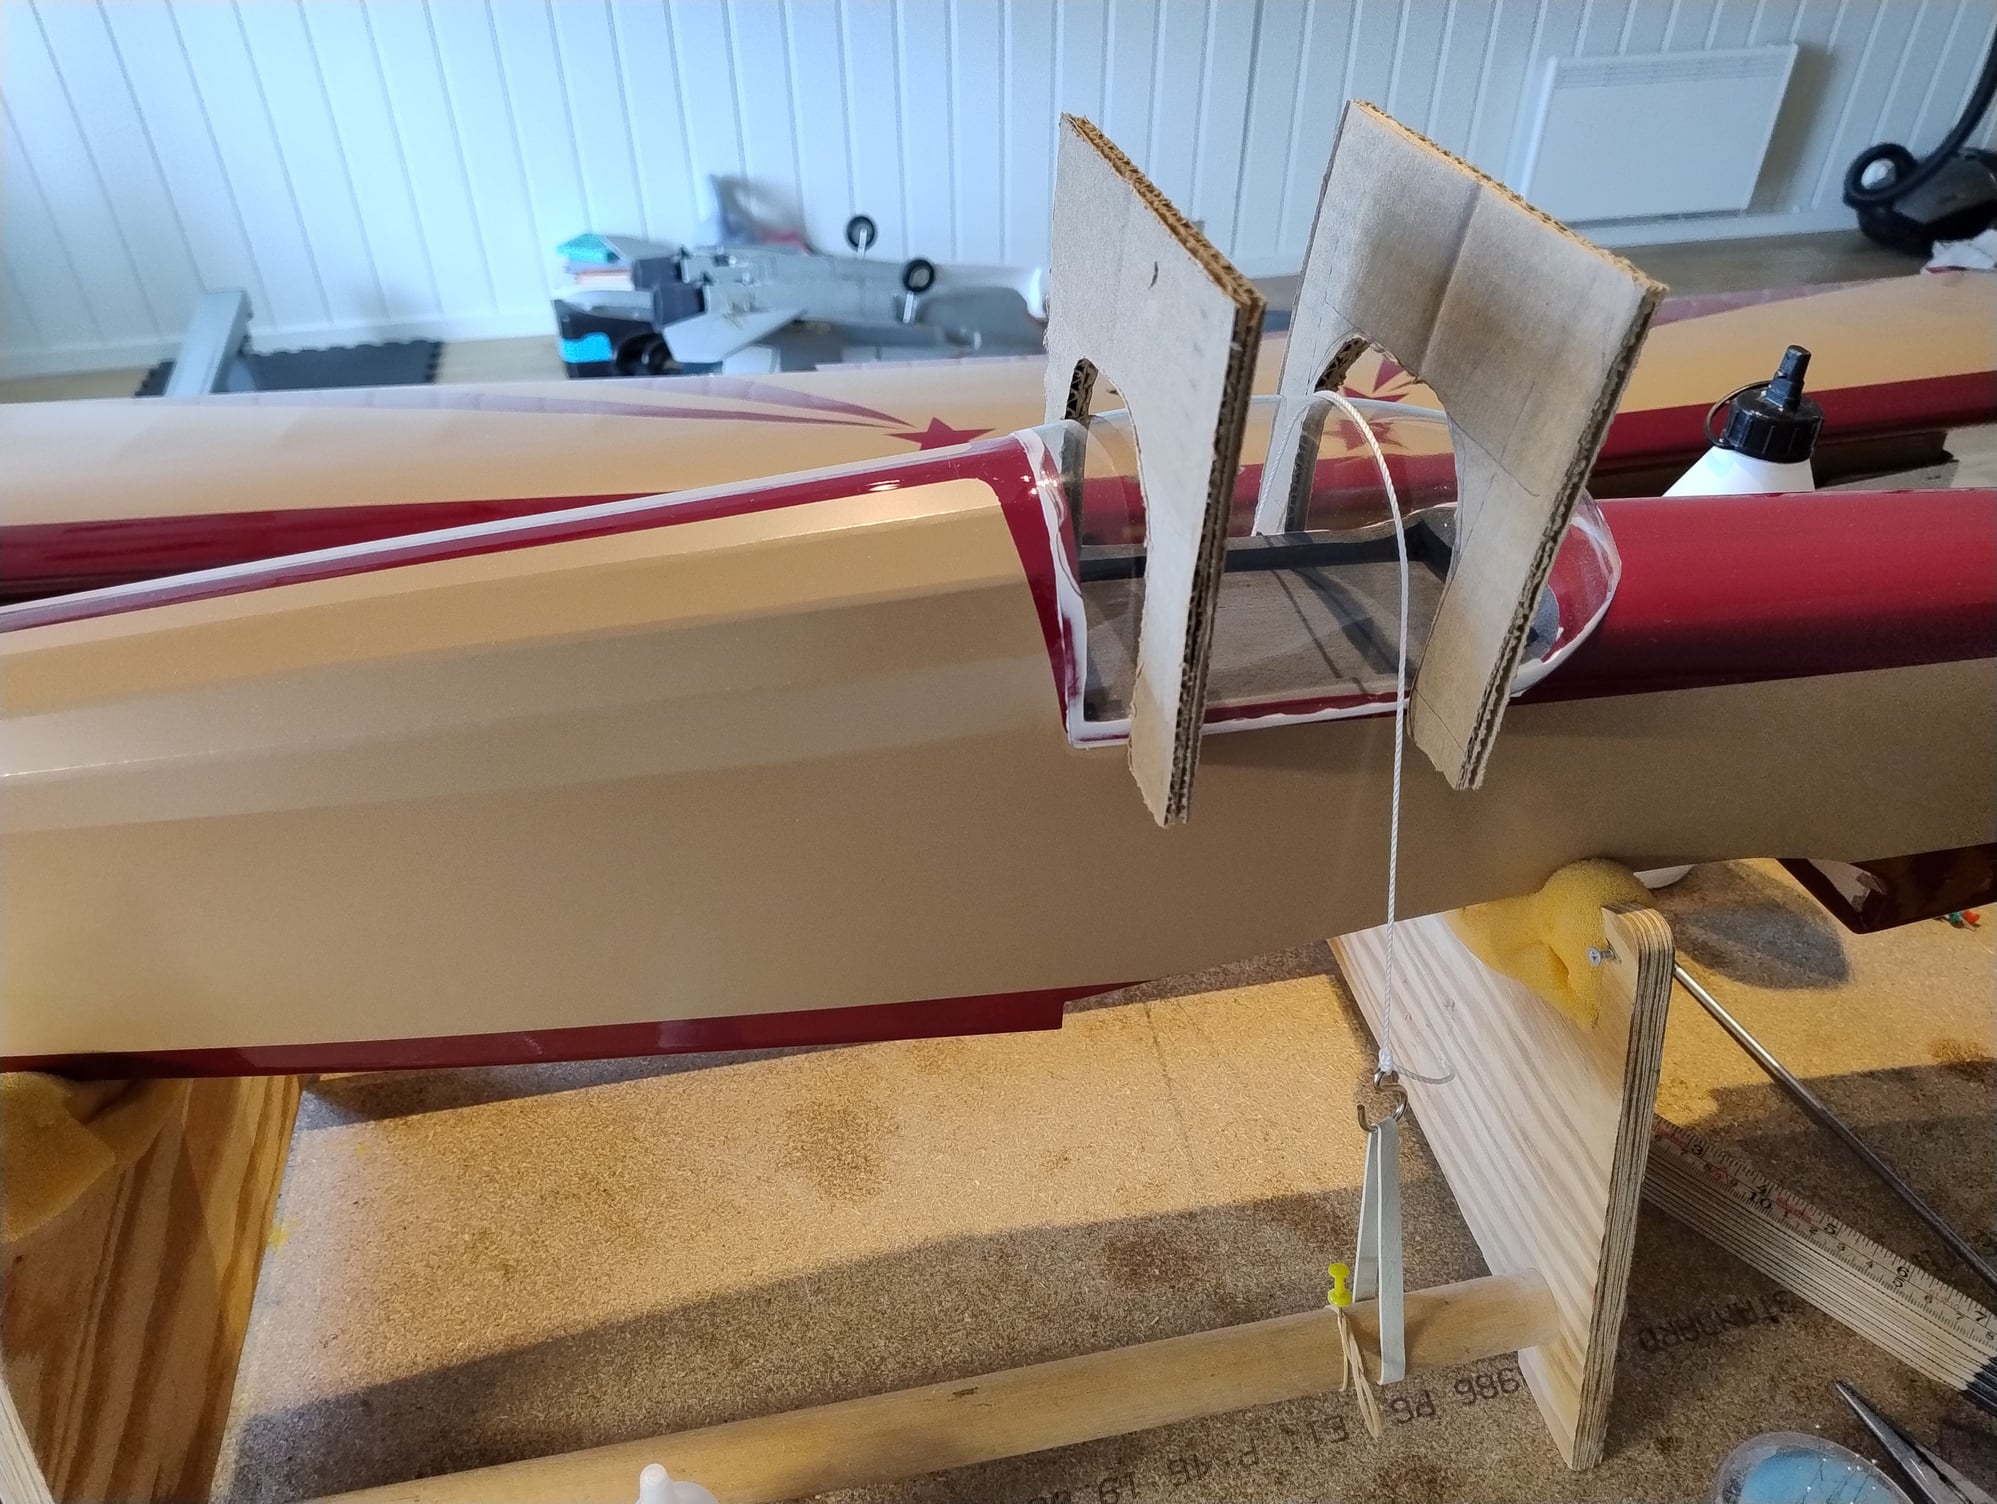
After a bit of thinking and fiddling, I found a doable solution. I used pins a few places along the edge to make sure that the canopy would get into position right away. Then I put a string with a slight tension from a rubber band from the cradle over the top of the canopy to hold it down. I also made some "clamps" from laminated cardboard to hold the sides to the fuselage. The provided enough clamping force and was light enough to not disturb anything else. The Canopy glue runs quite easily, so had to apply in a way to avoid running as best as possible.
Pins was removed right after canopy was set in position and clamped in place. Pretty happy with the result. Looks way better when the glue had cured clear:
Trial fitting before gluing:
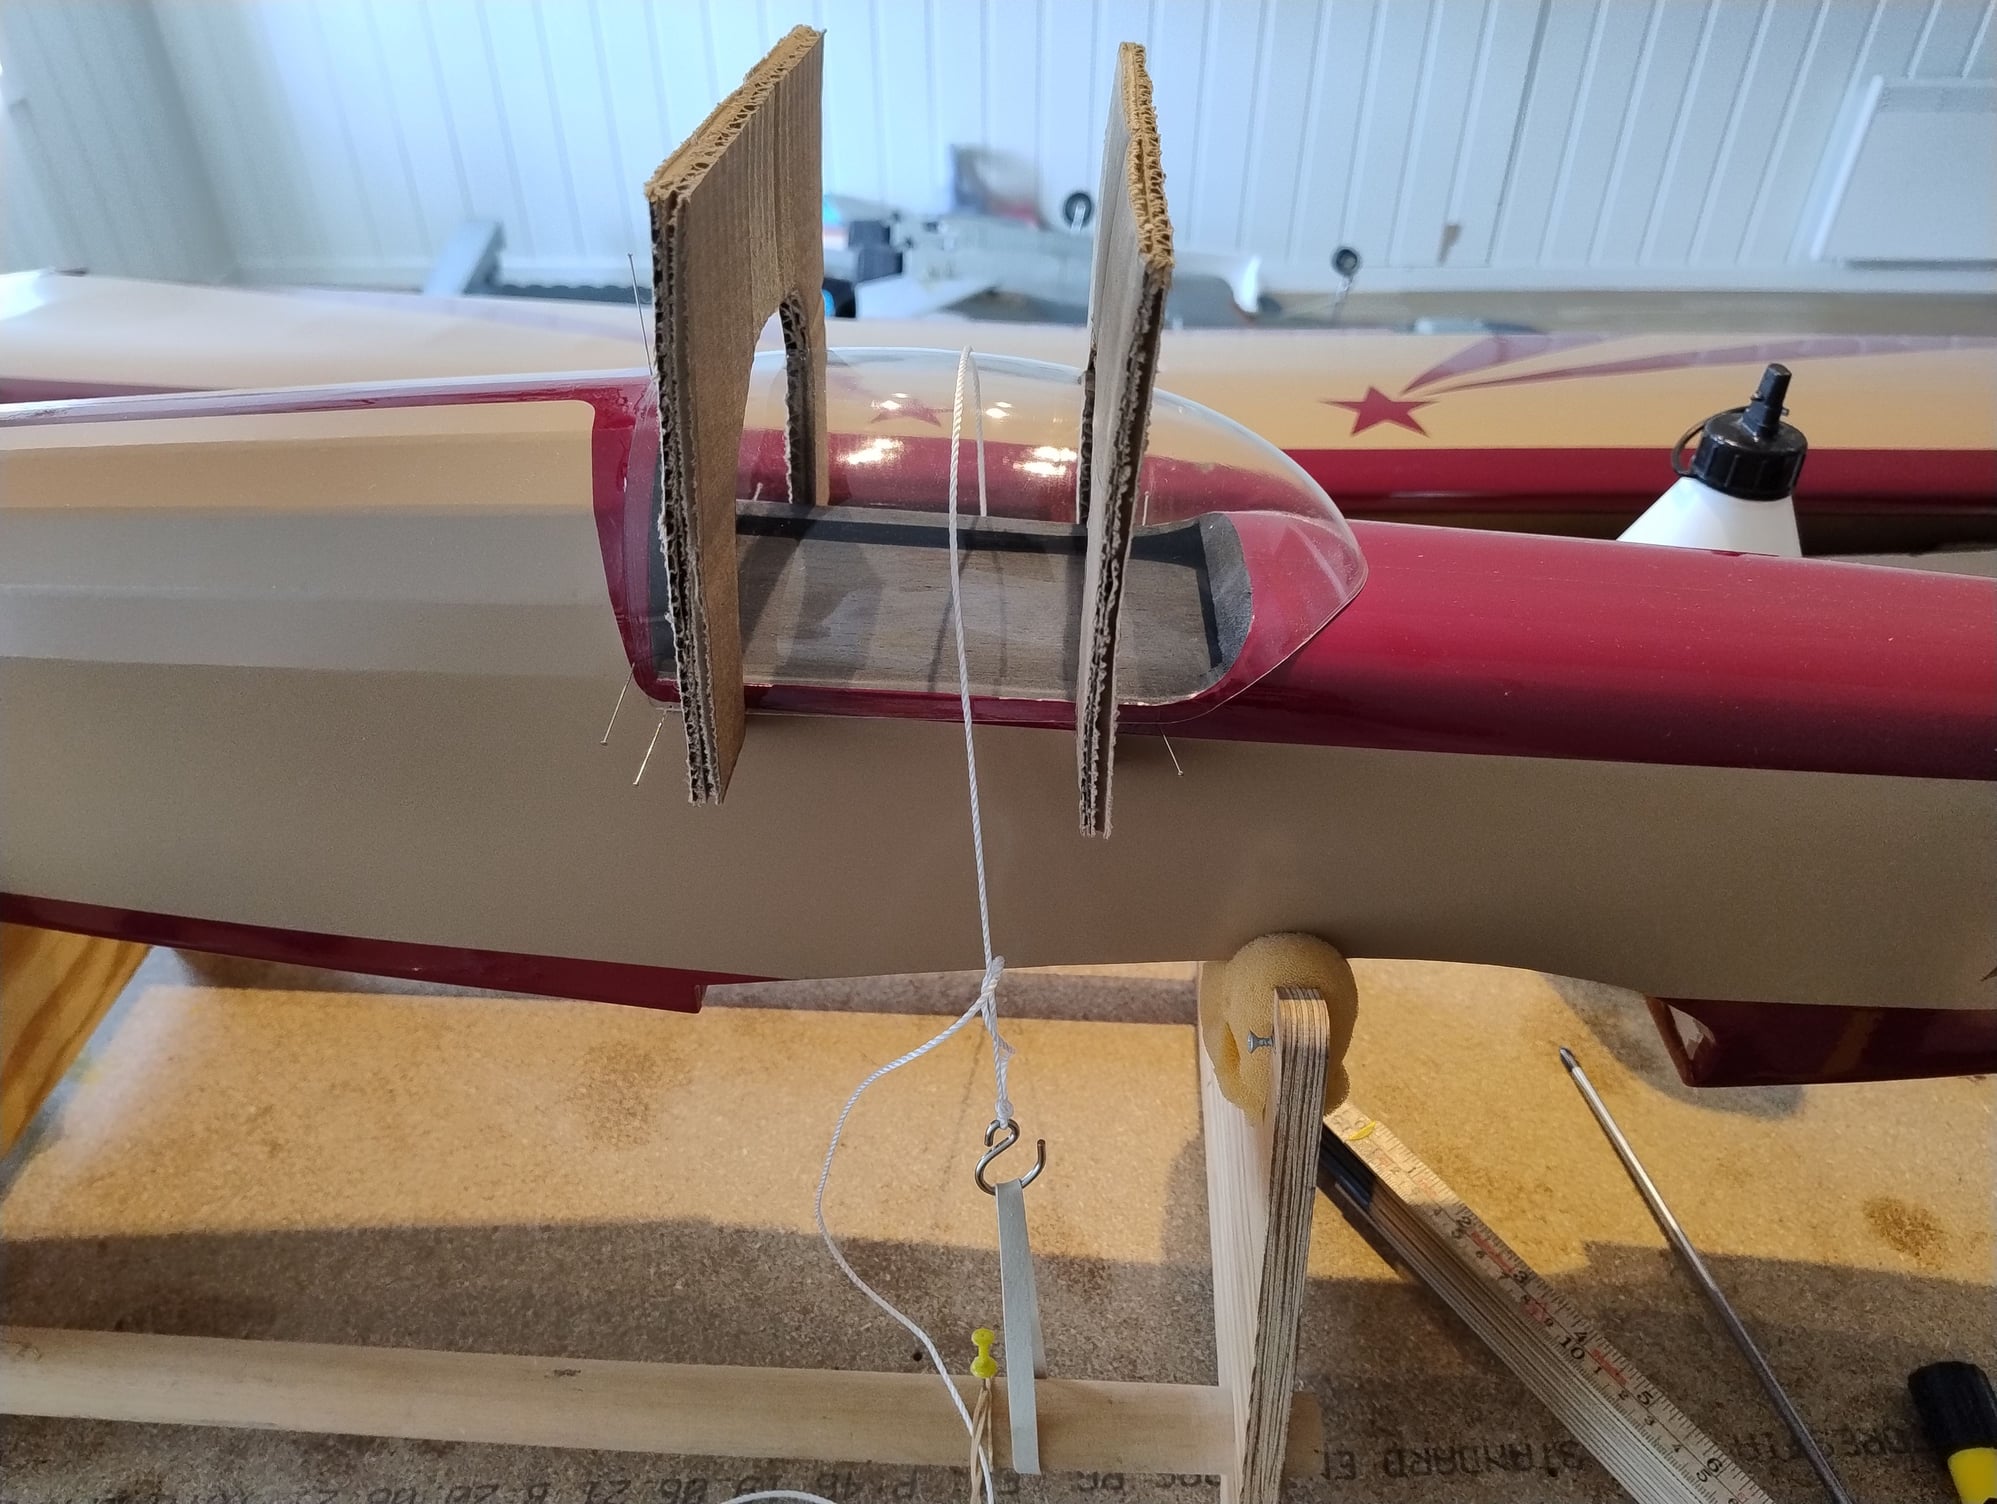
Pins removed after fitting, before glue dries. Excessive glue could easily be removed with a wet cloth all way round:
The canopy did not have a perfect fit. Needed to be held down a bit and sides pushed in during curing. Clamps and tape would not be the best due to its weight and tape would just mess up the glue and covering.
After a bit of thinking and fiddling, I found a doable solution. I used pins a few places along the edge to make sure that the canopy would get into position right away. Then I put a string with a slight tension from a rubber band from the cradle over the top of the canopy to hold it down. I also made some "clamps" from laminated cardboard to hold the sides to the fuselage. The provided enough clamping force and was light enough to not disturb anything else. The Canopy glue runs quite easily, so had to apply in a way to avoid running as best as possible.
Pins was removed right after canopy was set in position and clamped in place. Pretty happy with the result. Looks way better when the glue had cured clear:
Trial fitting before gluing:
Pins removed after fitting, before glue dries. Excessive glue could easily be removed with a wet cloth all way round:
Last edited by MrRover75; 06-11-2024 at 01:14 AM.
The following users liked this post:
G.F. Reid (06-11-2024)
06-11-2024, 07:08 AM
#28


You might want to try t-pins in the future. I find them much easier to handle and when they get glued in place they're easy to twist and break the
adhesion.
adhesion.
The following users liked this post:
MrRover75 (06-11-2024)
06-11-2024, 09:46 AM
#29
Senior Member
My Feedback: (2)
Join Date: Apr 2020
Location: Metro Atlanta GA, USA
Posts: 416
Likes: 0
Received 36 Likes
on
32 Posts
The SS is looking very nice, MrRover75! Just on looks alone, the one I built about 35 years ago was one of my favorites. It was a nice flier, until a servo failed and it rolled in.
I feel your pain on the canopy install. I just built a GB Ultimate from plans. I inadvertently warped the canopy while tinting it, and found it extremely difficult to clamp it all down tight at one time, even though I have a pretty well equipped woodworking shop with lots of specialized clamps. Almost nothing would clamp that canopy, and I resorted to sticks crossed over sticks and held together with rubber bands for the clamping force. The job came out pretty ugly, and I am not proud of it. Yours will look nice.
The following users liked this post:
MrRover75 (06-11-2024)
06-18-2024, 01:20 AM
#30
Finally!
Except for the wheelpants, all bits are in place an the SS60 ready for maiden flight It all ends up at 6 pounds on the scale, so pretty happy with that. Pretty happy with the result. always a few things that could be better, but that is the way it should be Canopy gluing turned out to be good after the glue had dried clear.

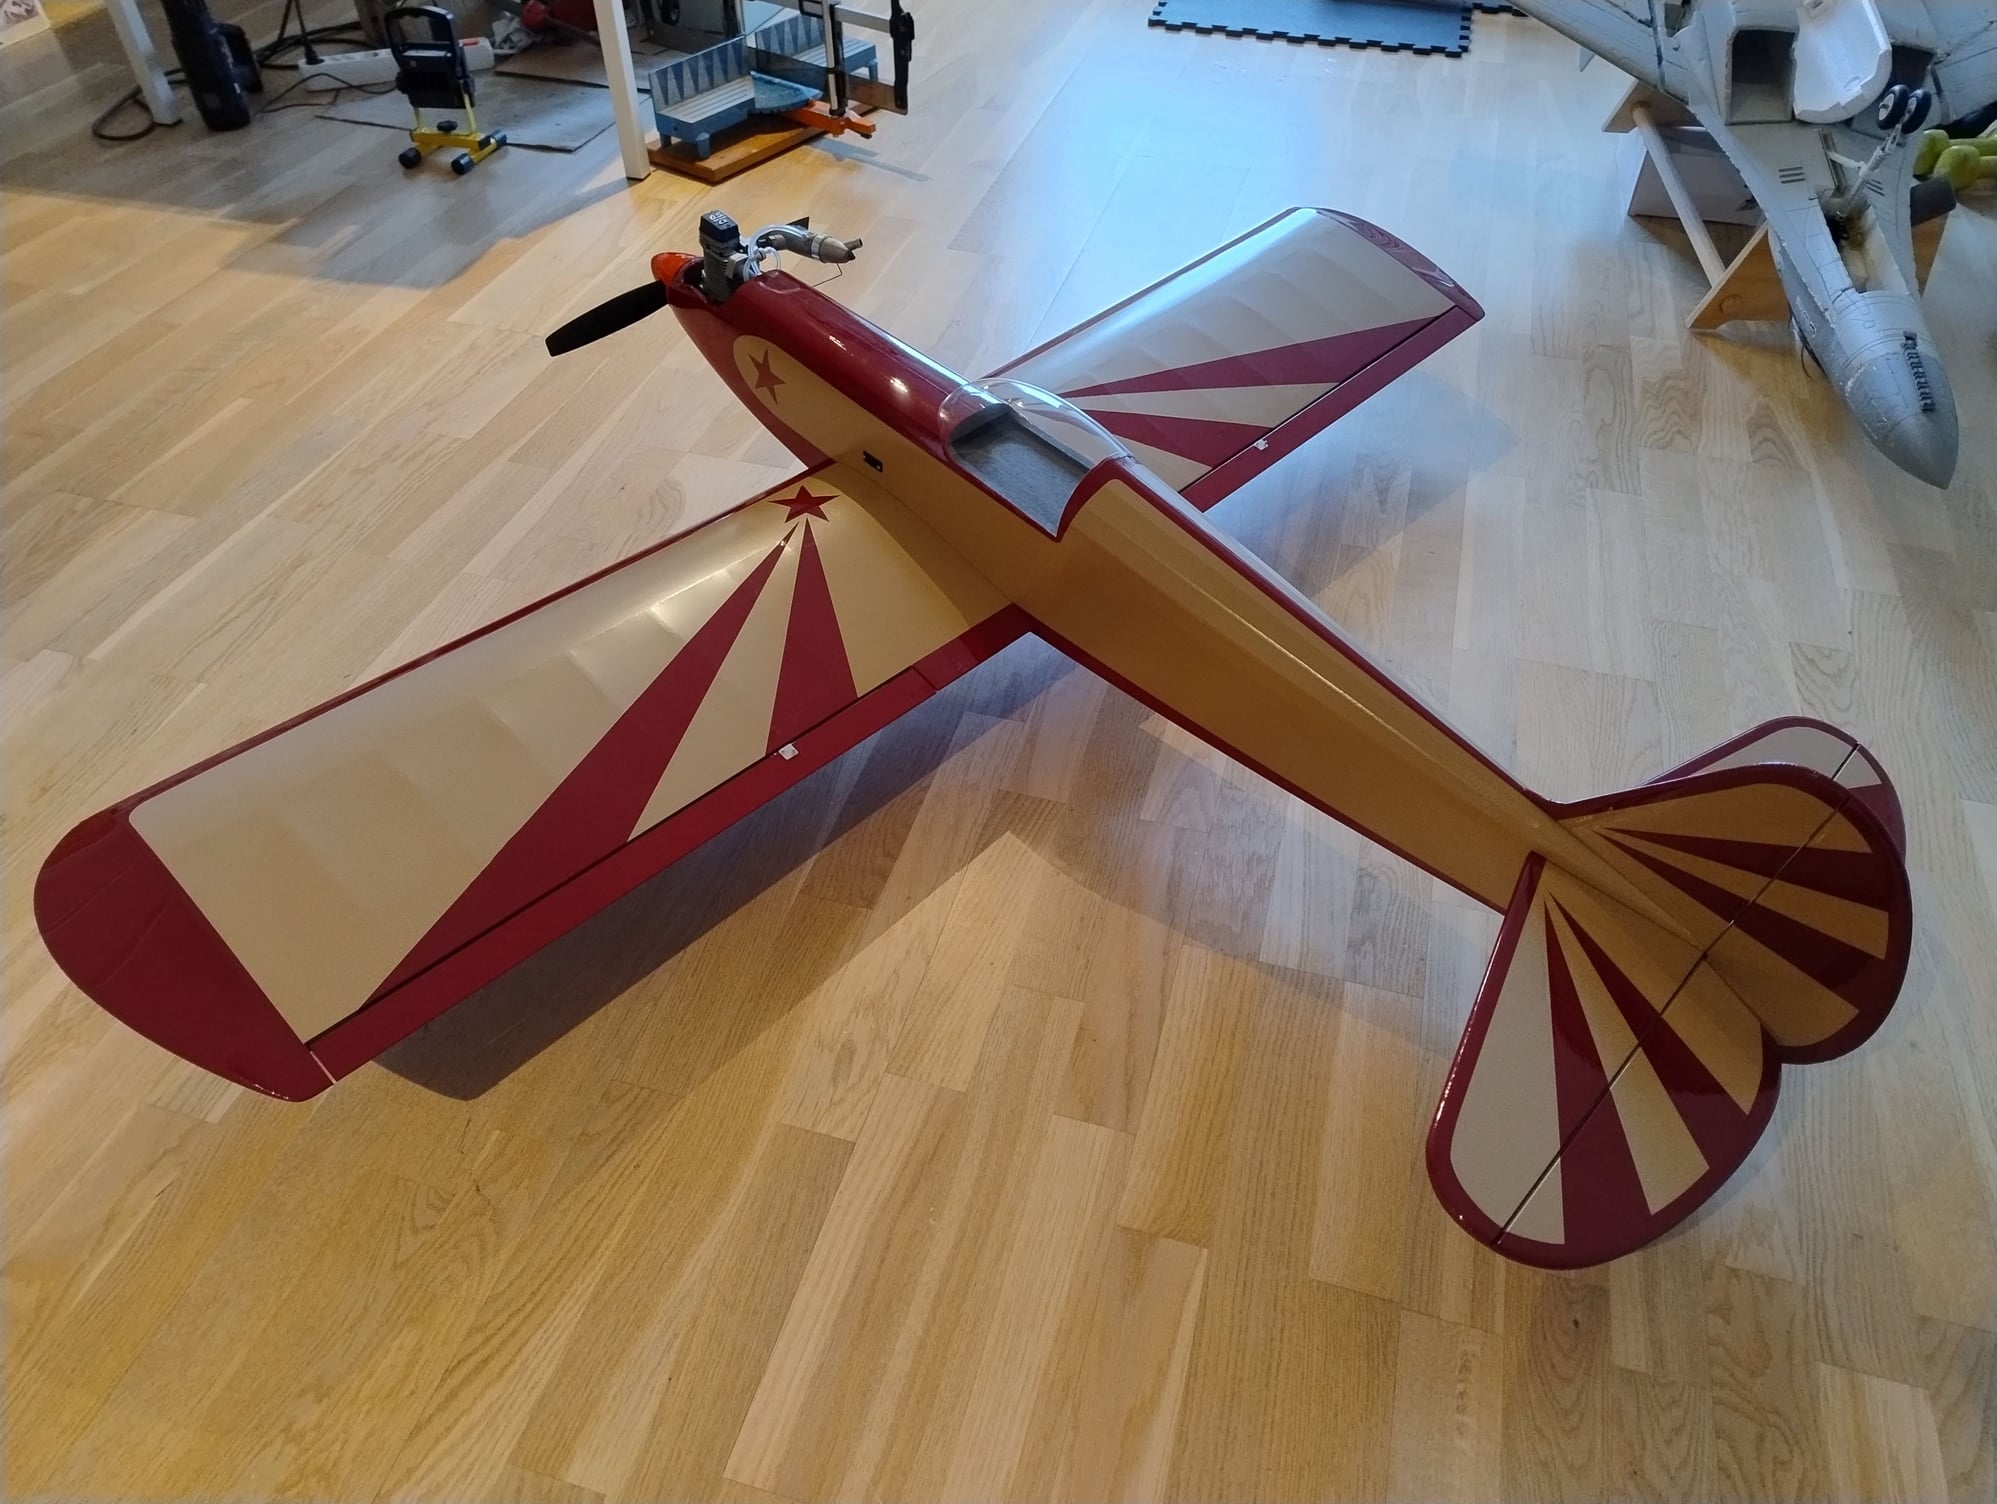
Except for the wheelpants, all bits are in place an the SS60 ready for maiden flight
It all ends up at 6 pounds on the scale, so pretty happy with that. Pretty happy with the result. always a few things that could be better, but that is the way it should be Canopy gluing turned out to be good after the glue had dried clear.
The following 2 users liked this post by MrRover75:
G.F. Reid (06-18-2024),
RICKSTUBBZ (06-18-2024)

The following users liked this post:
MrRover75 (06-23-2024)

The following users liked this post:
MrRover75 (06-23-2024)
The following users liked this post:
MrRover75 (06-23-2024)
06-23-2024, 11:27 PM
#34
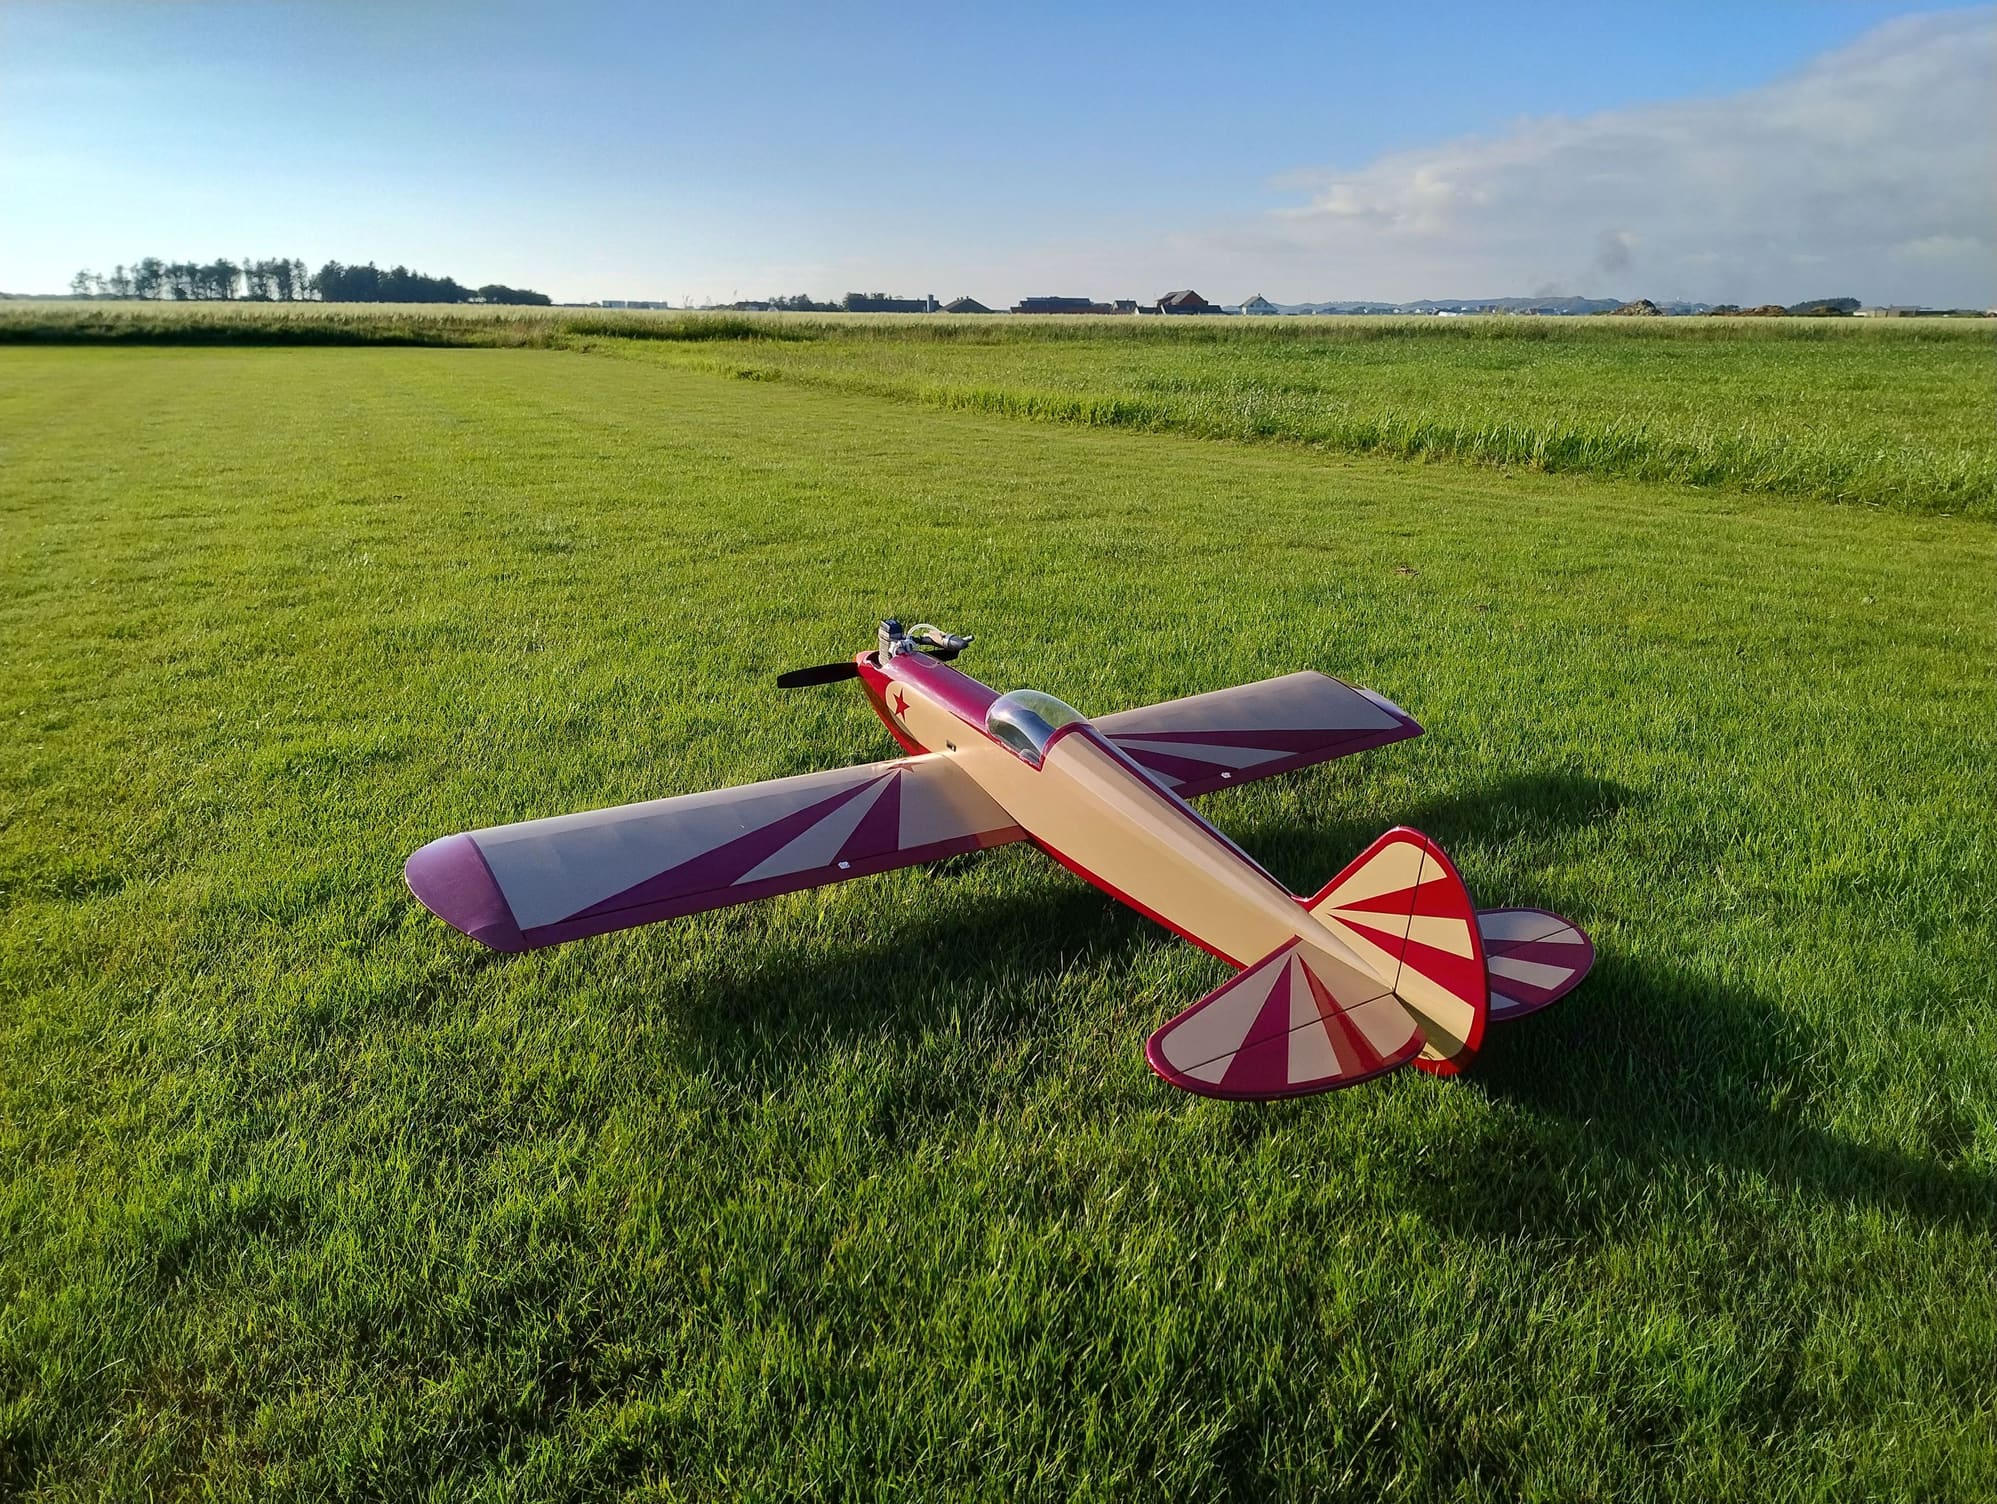
Maiden flight done 
It was a calm Saturday evening I decided to pack to stuff and went to the flying field. Fired up the OS @81 and had to do some minor adjustments. I replaced the bearings in this one prior to installation in the SS. Taxed to the end of the flying field. Did a final check on the direction for the control surfaces, idle and throttle response. No way back... gave it about 1/2 throttle, ready to give rudder and elevator control for a straight take off. Cant remember that I had to do any larger corrections. Added full throttle when started to roll straight and it took of nicely with a nice climb. Had to add 2-3 clicks of left aileron and some more up elevator. Gave it a few passes to verify trim and behaviour. And yes! Confirmed! Its like all says and as I can remember from my .20 size that I ditched for about 25 years ago... This is a smooth flying machine without any bad behaviour! Started do manoeuvres. Loops, rolls, standing and laying 8`s loops, stall turns, up-side down fly-by`s etc.. Oy Yes! This plane flies on a string Everything was straight and smooth!! The @81 did not give unlimited vertical performance, but more than enough to pull the plane through. Did a last full throttle downwind pass, pulled it through a stall turn and aimed for landing. The plane slowed down nicely and I adjusted the decent by adding some throttle. It flared nicely the second before touchdown and took the ground nicely. It nearly tipped over, so not a 10-er landing The excuse must be that it had been raining earlier that day so the grass was a bit soggy
Conclusion: The SS is what it is-- a great plane!! Not much to do different about this one. A Saito 100 might be a better engine choice due to its power and weight, but I would avoid a heavy .91 engine. I might try to move the CG a bit more AFT. The tendency for tipover and need for up-elevator trim indicates this. CG is already a tad behind the recommended CG.
So now, wheelpants missing. Lets get that done sooner or later
It was a calm Saturday evening I decided to pack to stuff and went to the flying field. Fired up the OS @81 and had to do some minor adjustments. I replaced the bearings in this one prior to installation in the SS. Taxed to the end of the flying field. Did a final check on the direction for the control surfaces, idle and throttle response. No way back... gave it about 1/2 throttle, ready to give rudder and elevator control for a straight take off. Cant remember that I had to do any larger corrections. Added full throttle when started to roll straight and it took of nicely with a nice climb. Had to add 2-3 clicks of left aileron and some more up elevator. Gave it a few passes to verify trim and behaviour. And yes! Confirmed! Its like all says and as I can remember from my .20 size that I ditched for about 25 years ago... This is a smooth flying machine without any bad behaviour! Started do manoeuvres. Loops, rolls, standing and laying 8`s loops, stall turns, up-side down fly-by`s etc.. Oy Yes! This plane flies on a string
Everything was straight and smooth!! The @81 did not give unlimited vertical performance, but more than enough to pull the plane through. Did a last full throttle downwind pass, pulled it through a stall turn and aimed for landing. The plane slowed down nicely and I adjusted the decent by adding some throttle. It flared nicely the second before touchdown and took the ground nicely. It nearly tipped over, so not a 10-er landing The excuse must be that it had been raining earlier that day so the grass was a bit soggy Conclusion: The SS is what it is-- a great plane!! Not much to do different about this one. A Saito 100 might be a better engine choice due to its power and weight, but I would avoid a heavy .91 engine. I might try to move the CG a bit more AFT. The tendency for tipover and need for up-elevator trim indicates this. CG is already a tad behind the recommended CG.
So now, wheelpants missing. Lets get that done sooner or later
The following 4 users liked this post by MrRover75:
carlgrover (06-24-2024),
G.F. Reid (06-24-2024),
RICKSTUBBZ (06-24-2024),
Superdutyspinner (06-24-2024)


